
Charger Setup (iOS)
Setup
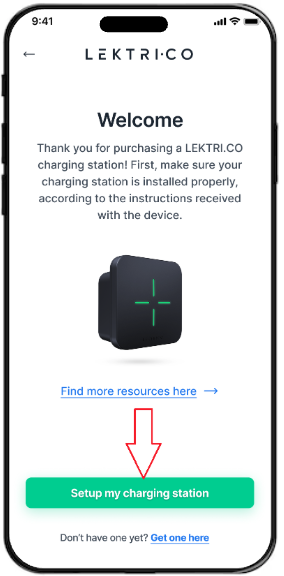
When you have no devices associated with your account you will see the following screen.
You will need to click on the green “Setup my charging station” button on the bottom.
Next you will be asked to enter the serial number of the charger you want to set up.
You can find the serial number on the label.
Enter the serial number.
Click on the green “Connect” button on the bottom.
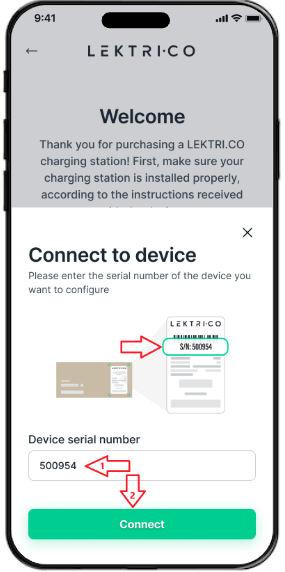
NOTE: The serial numbers in the picture are just examples.
Next, your phone will try to connect to your charger.
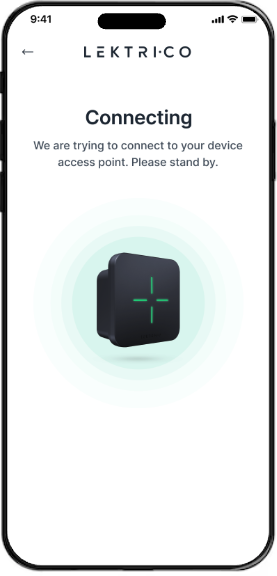
NOTE: During the setup process please keep your phone between 2 and 5 meters away from your charger.
Troubleshooting: Encountered problems at this step? See Troubleshooting 1
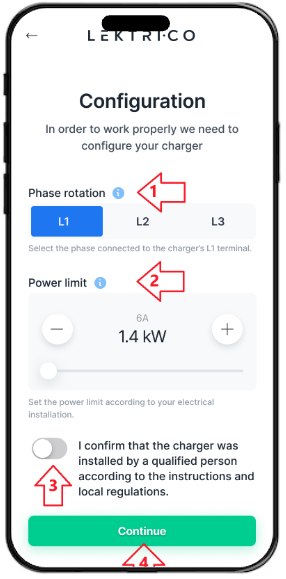
After the phone has connected to your charger you will get this screen where you will have to do the following:
If you have a 3 phase installation, select which phase did you connect to L1 from the charger. If you have a monophase Installation select L1
Select the “Power Limit”. The maximum charging power allowed Confirm that you are qualified to do these settings
Click on the green “Continue” button to proceed
In this step you have to choose if you want to use your charger in “Online” mode or “Offline” mode. We highly recommend choosing “Online” mode so that you can use all the features available and to get continuous firmware and feature updates.
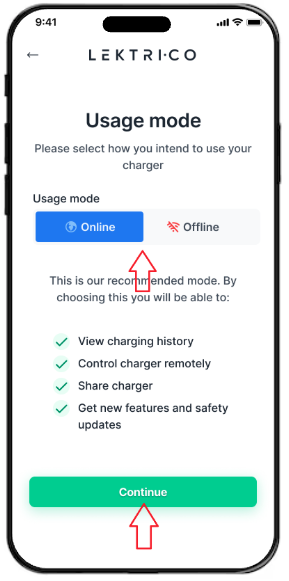
WARNING: Using the charger in “Offline” mode could create issues of compatibility between newer versions of the app and older versions of charger firmware. Also, you will not be able to get help from our support team.
Click on the green “Continue” button after you chose the “Usage mode”.
After choosing “Online” mode you will see the following screen while the charger is searching for available WiFi networks. This will take several seconds.
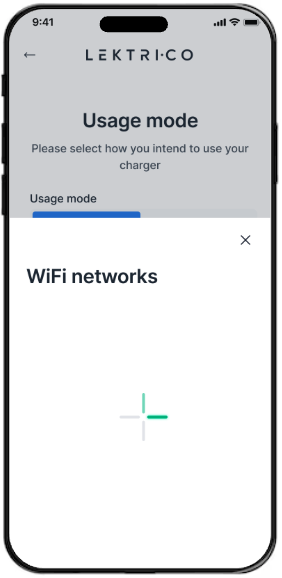
NOTE: If no WiFi networks show up it means that the charger cannot detect any WiFi networks in the vicinity. Your phone may detect some networks but the antenna of the charger is smaller and not as powerful as the one in your phone. You may need to install a WiFi Extender or another Access Point nearby.
When the charger finished searching for available WiFi networks you will find them displayed like in the picture.
The WiFi networks in the picture are only an example. In the app you will see different networks. You will have to choose which network the charger should connect to.
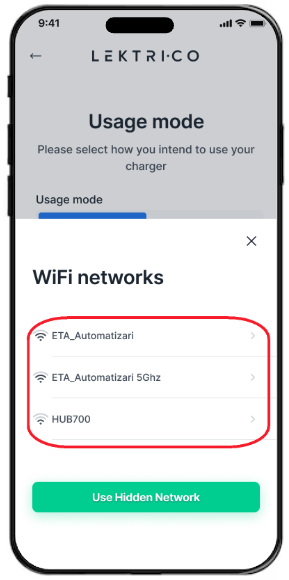
NOTE: The name of the WiFi network in the picture is just an example.
IMPORTANT: You need to choose a 2.4Ghz network. It will NOT work with a 5Ghz network.
Troubleshooting: Encountered problems at this step? See Troubleshooting 2
After you selected the WiFi network that you want the charger to connect to you will have to enter the password of the network.
When you have entered the password click on the green “Connect to network” button. If, by mistake you chose the wrong network, you can go back to the previous screen by clicking on the “Use another network” button.
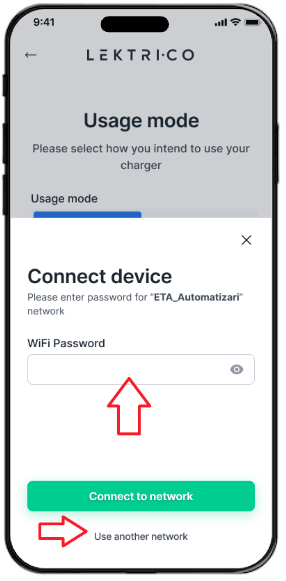
NOTE: The name of the WiFi network in the picture is just an example.
After you entered the password for the network, the charger will try to connect to it and you will see the screen on the right.
It may take several seconds for the charger to successfully connect.
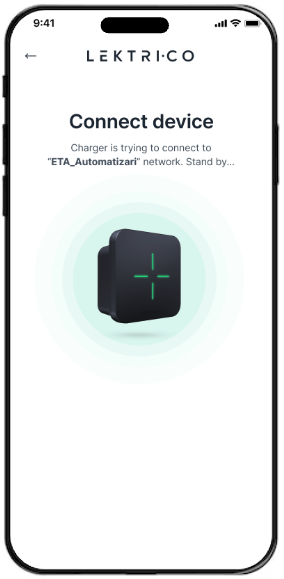
NOTE: The name of the WiFi network in the picture is just an example.
Troubleshooting: Encountered problems at this step? See Troubleshooting 3
Once the charger has connected successfully to the selected WiFi network the screen will look like on the right.
At this point you will have to select either the “Go to dashboard” or “Add another device” if you want to resume the setup for another device.
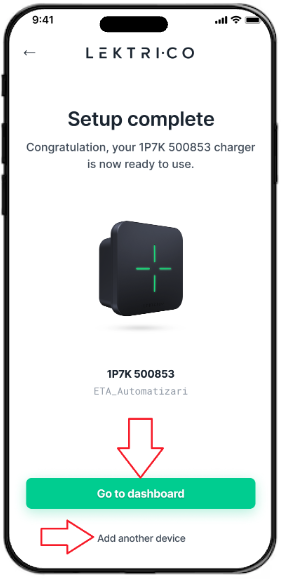
NOTE: The name of the WiFi network in the picture is just an example.
Troubleshooting 1
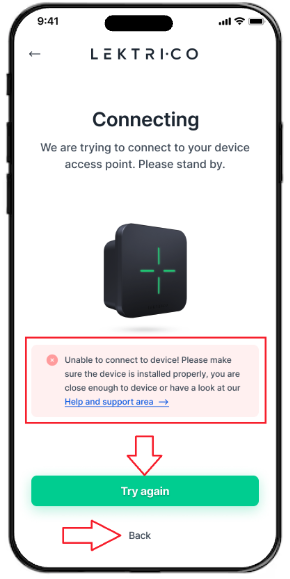
If your phone fails to connect the the charger you will see the screen on the right with the highlighted message.
You can try again by pressing the green “Try again” button but be sure that the phone is 2 to 5 meters away from the charger.
Or, you can go back on step to the list of found devices by pressing the “Back” button.
Troubleshooting 2
If you use a hidden network you will have to enter the WiFi SSID and the password and then press on the “Connect to network” button.
If you got here by mistake you can go back to the previous step by pressing the “Use another network” button.

Troubleshooting 3
If for some reason the charger is not able to connect to the selected network you will see the screen on the right. In this case you can retry by pressing the green “Retry” button or go back to select another network by pressing the “Use another network” button.
If you entered the wrong password you can press “Use another network” and you will be able to select the network and enter the password again.
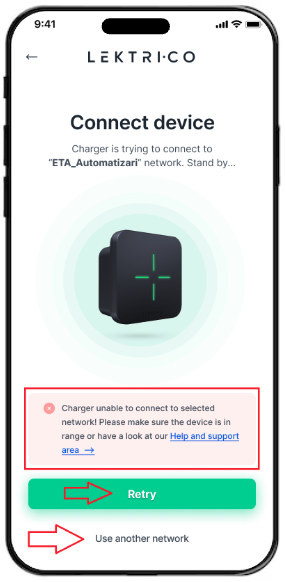
NOTE: The name of the WiFi network in the picture is just an example.