
External Energy Meter and Inverter Integration
Overview
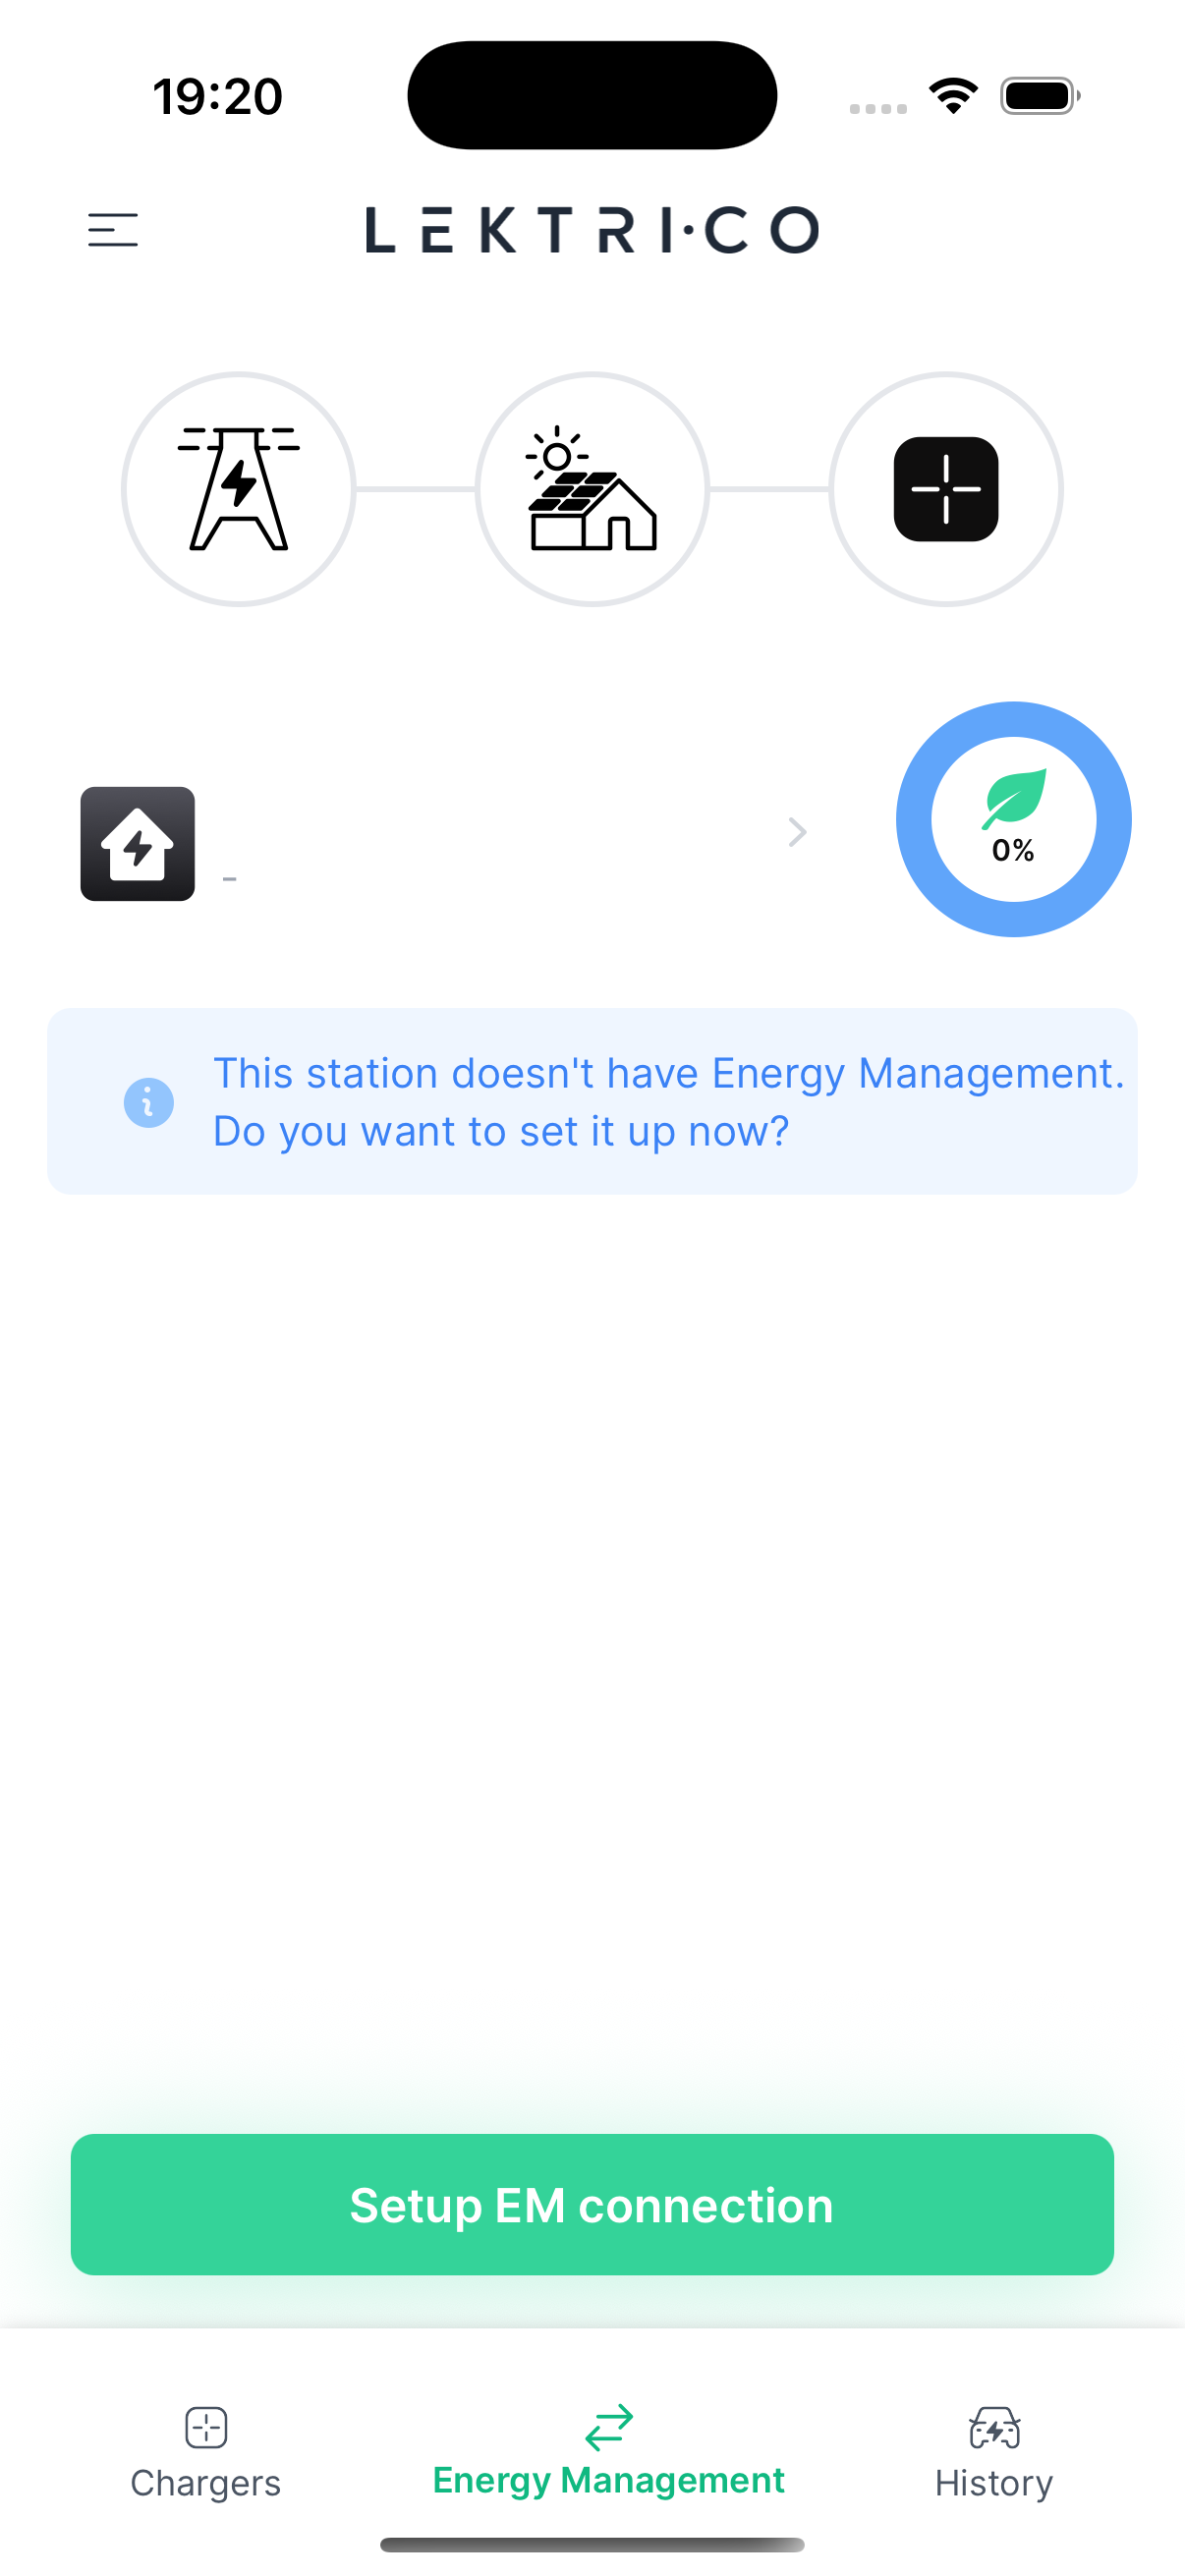
Connect an external energy meter, supported inverter, or meter to enable dynamic load balancing and solar charging with your LEKTRI.CO charger.
Access Energy Management screen and press on "Setup EM connection"
1. Tap "Start setup" to begin the integration process.

---
Select Device Type
Choose the external device you want to integrate with your LEKTRI.CO system.
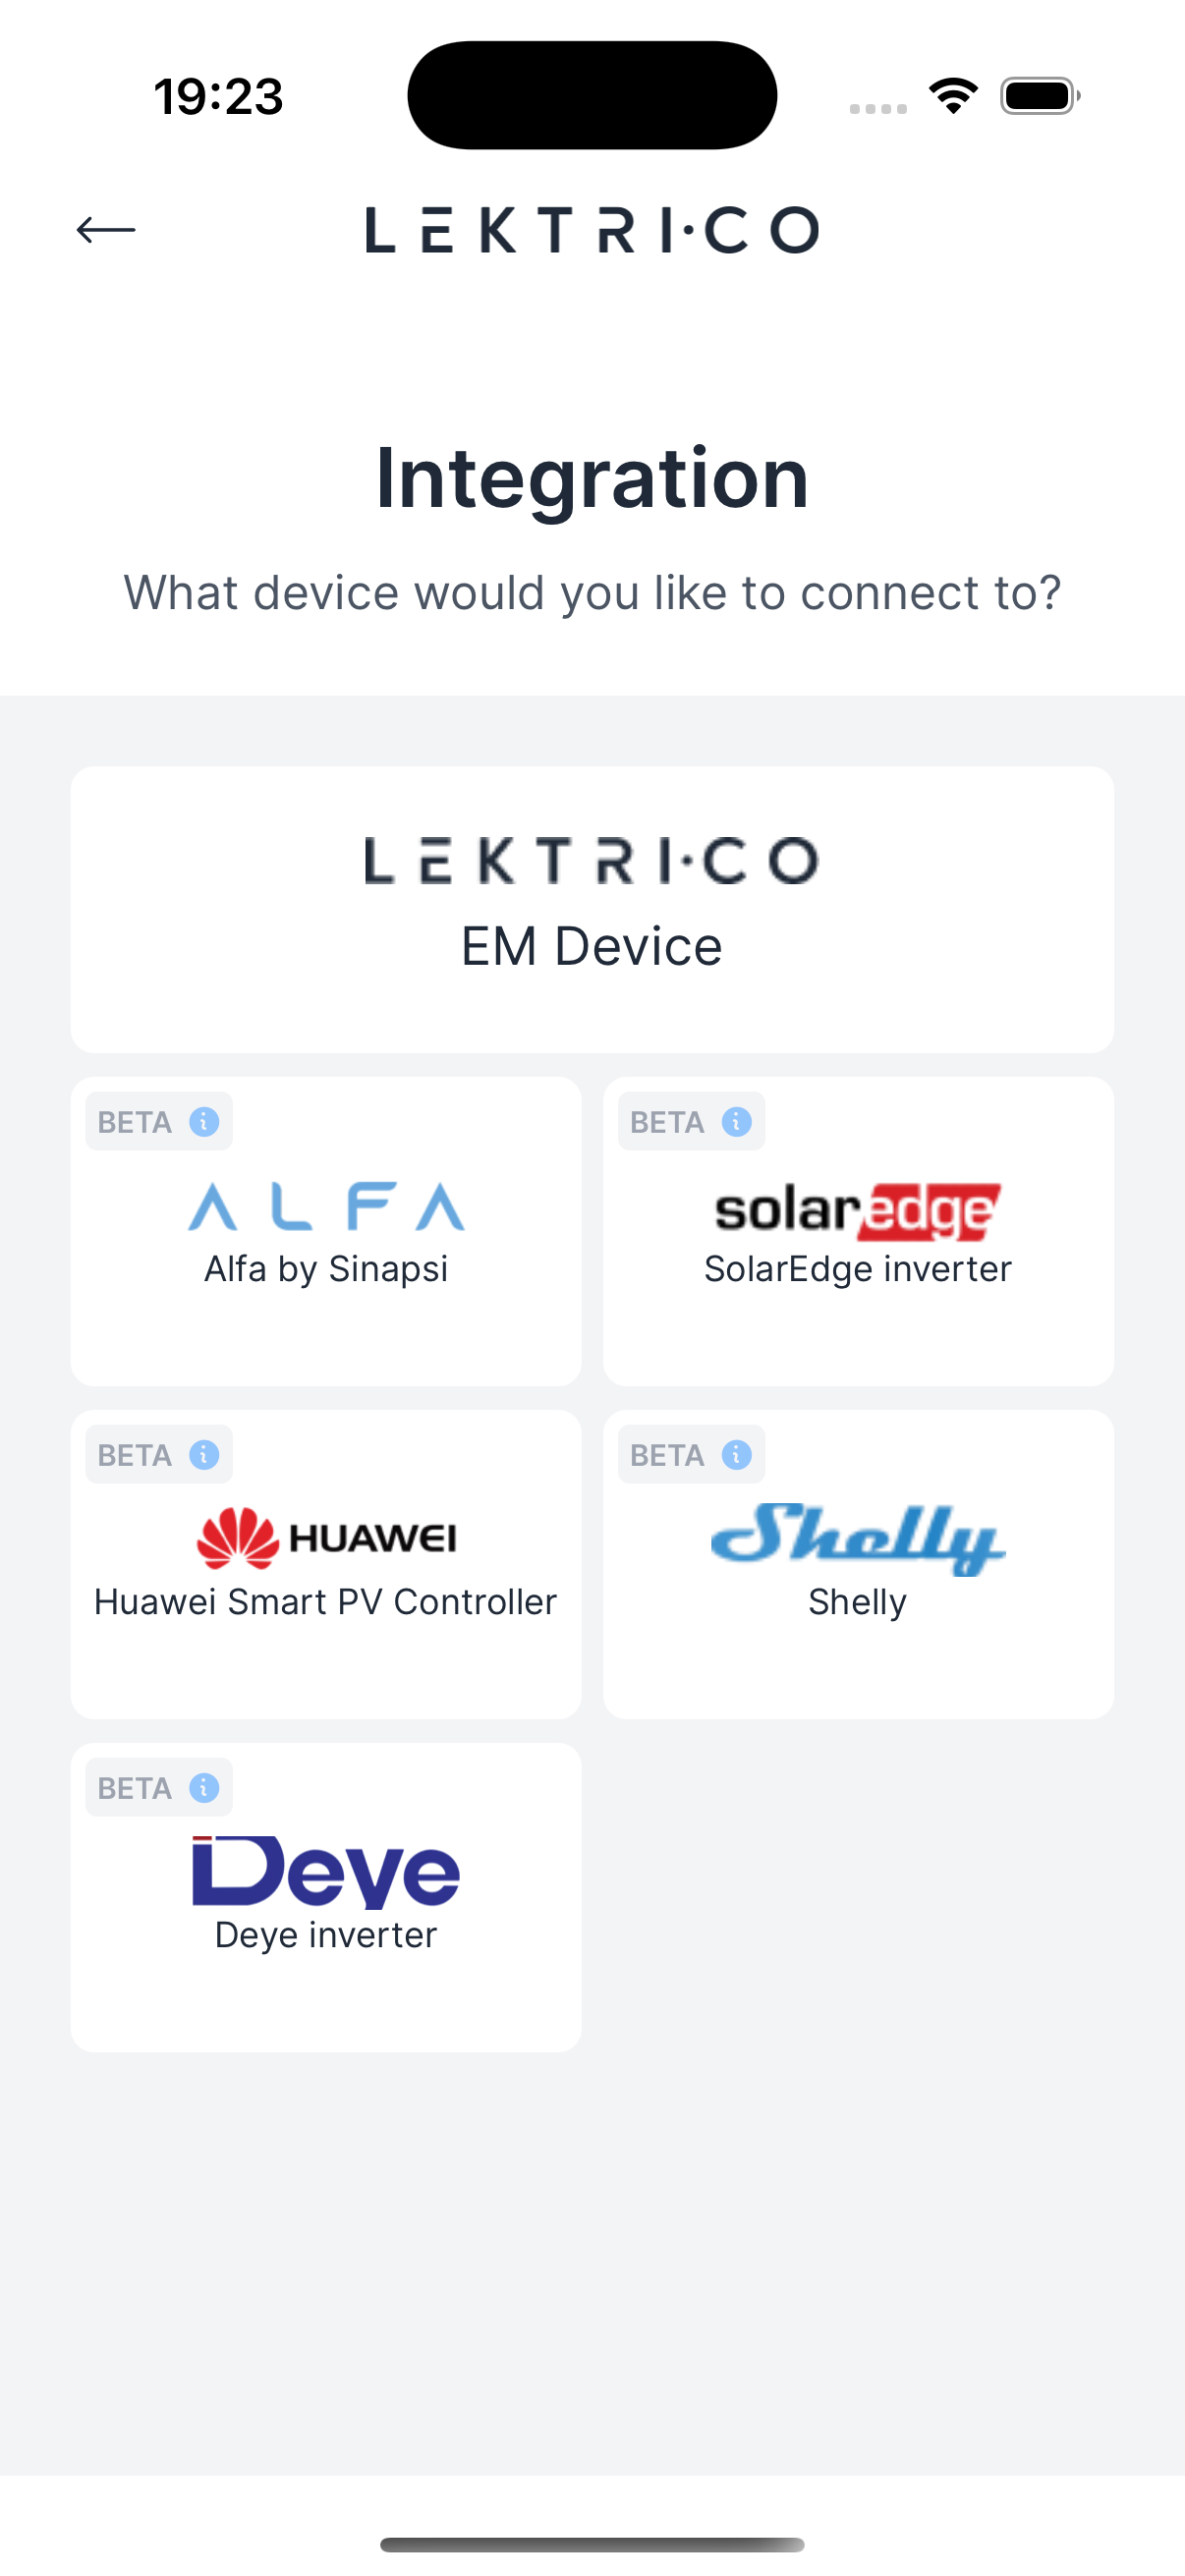
Supported devices include:
- Alfa by Sinapsi
- SolarEdge
- Huawei
- Shelly
- Deye
1. Tap on the device you want to connect.
> NOTE: If your device is not listed, check the LEKTRI.CO website for the latest supported integrations.
---
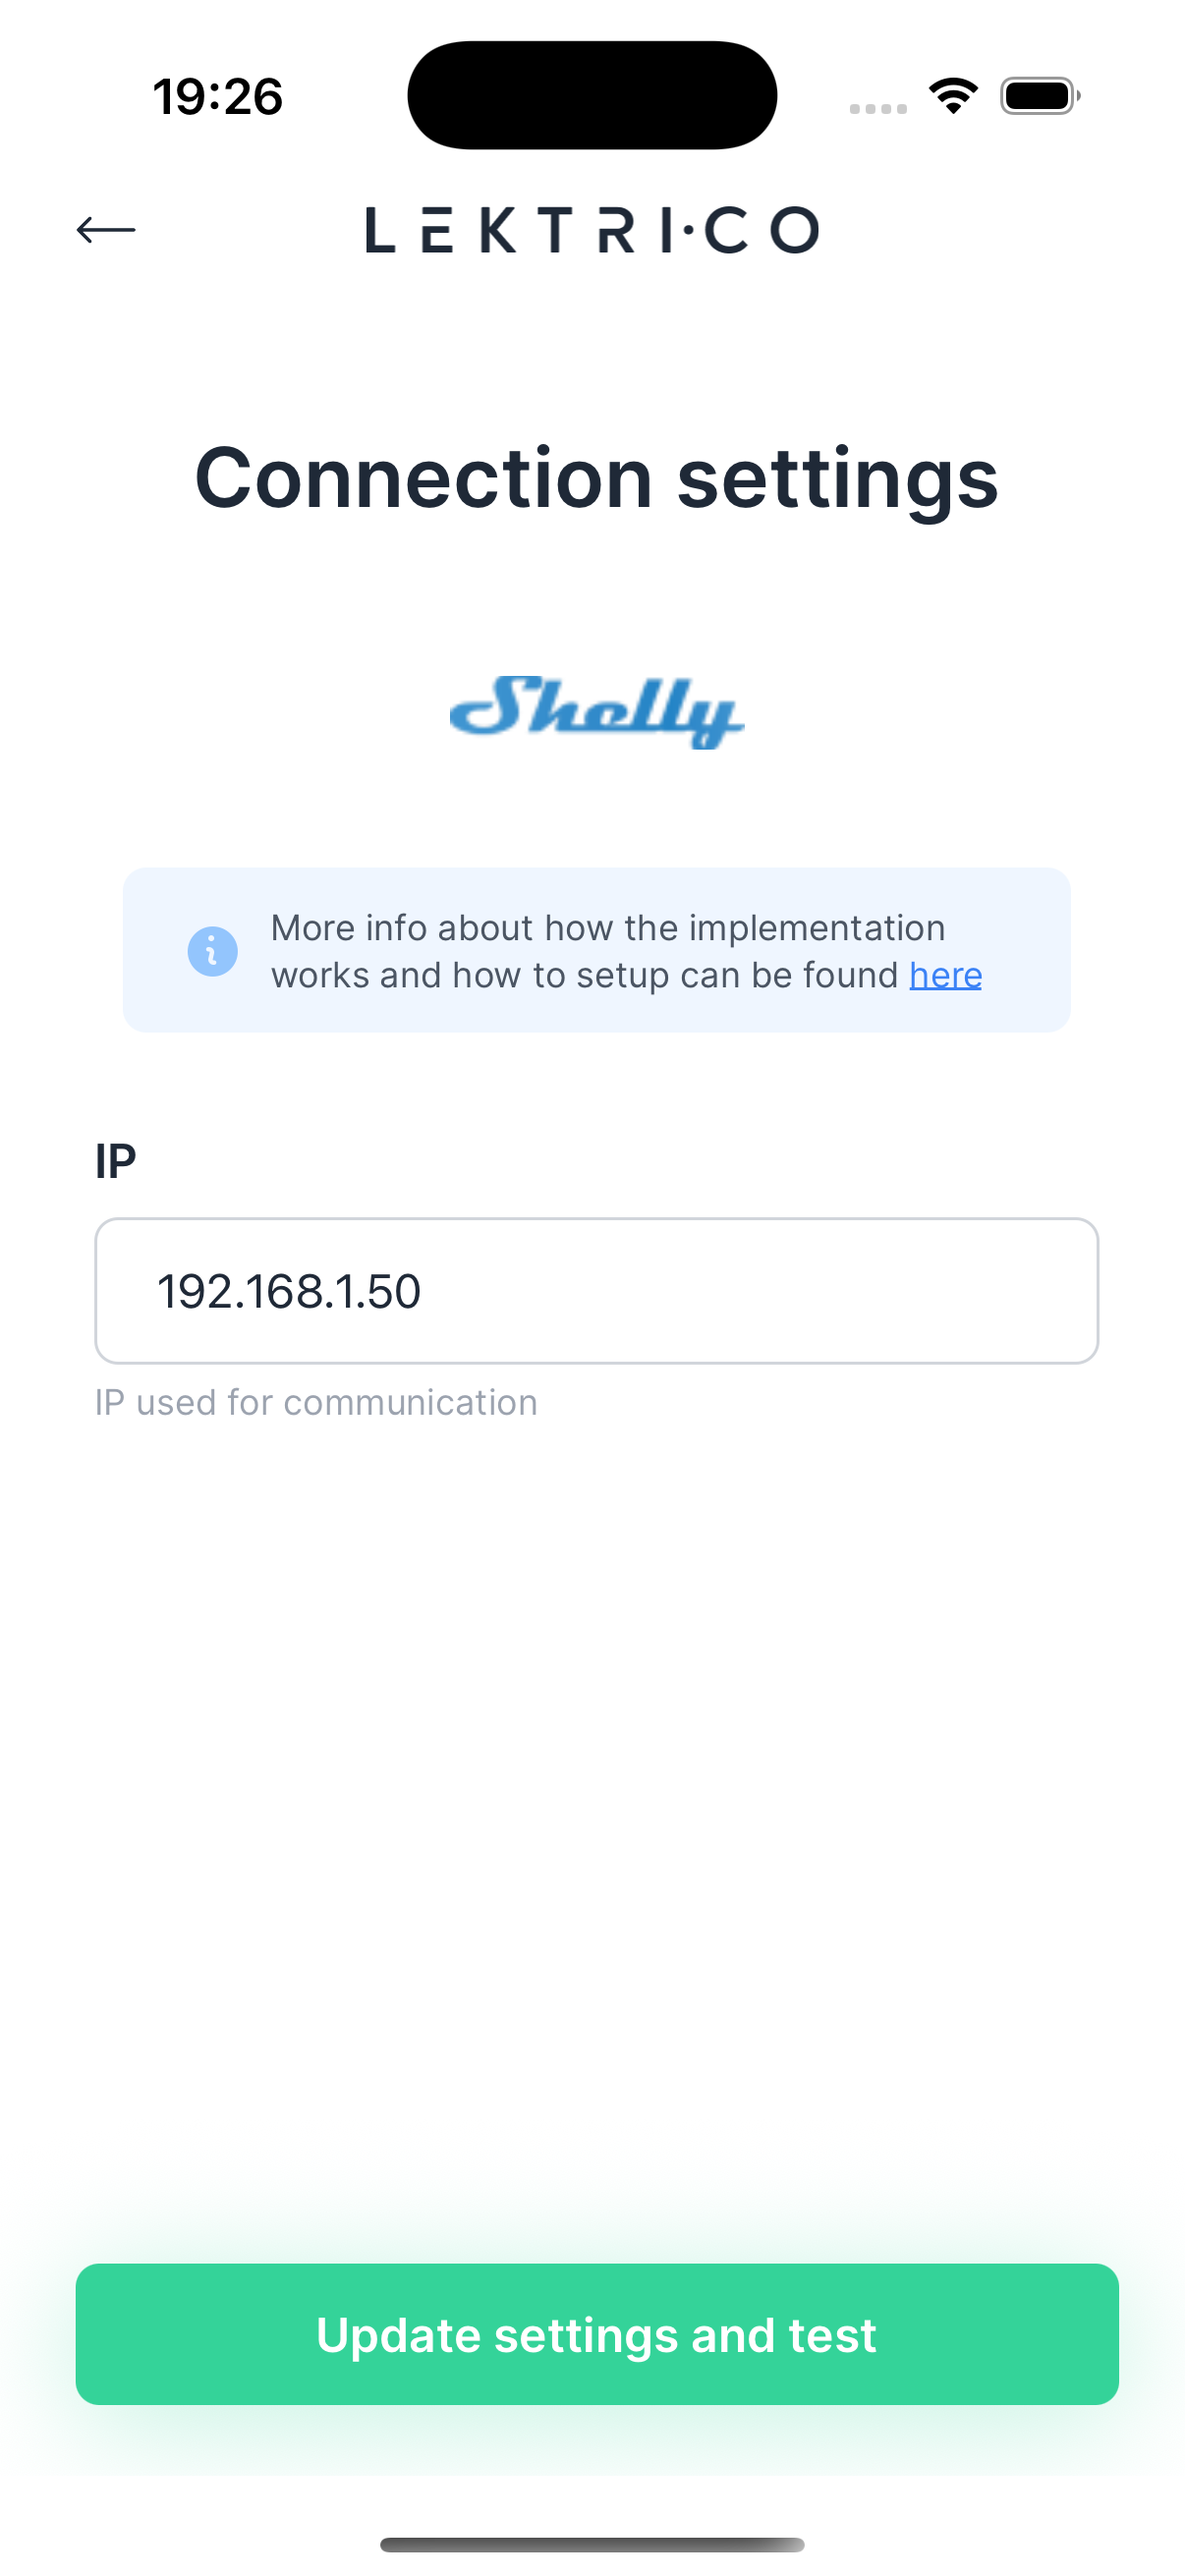
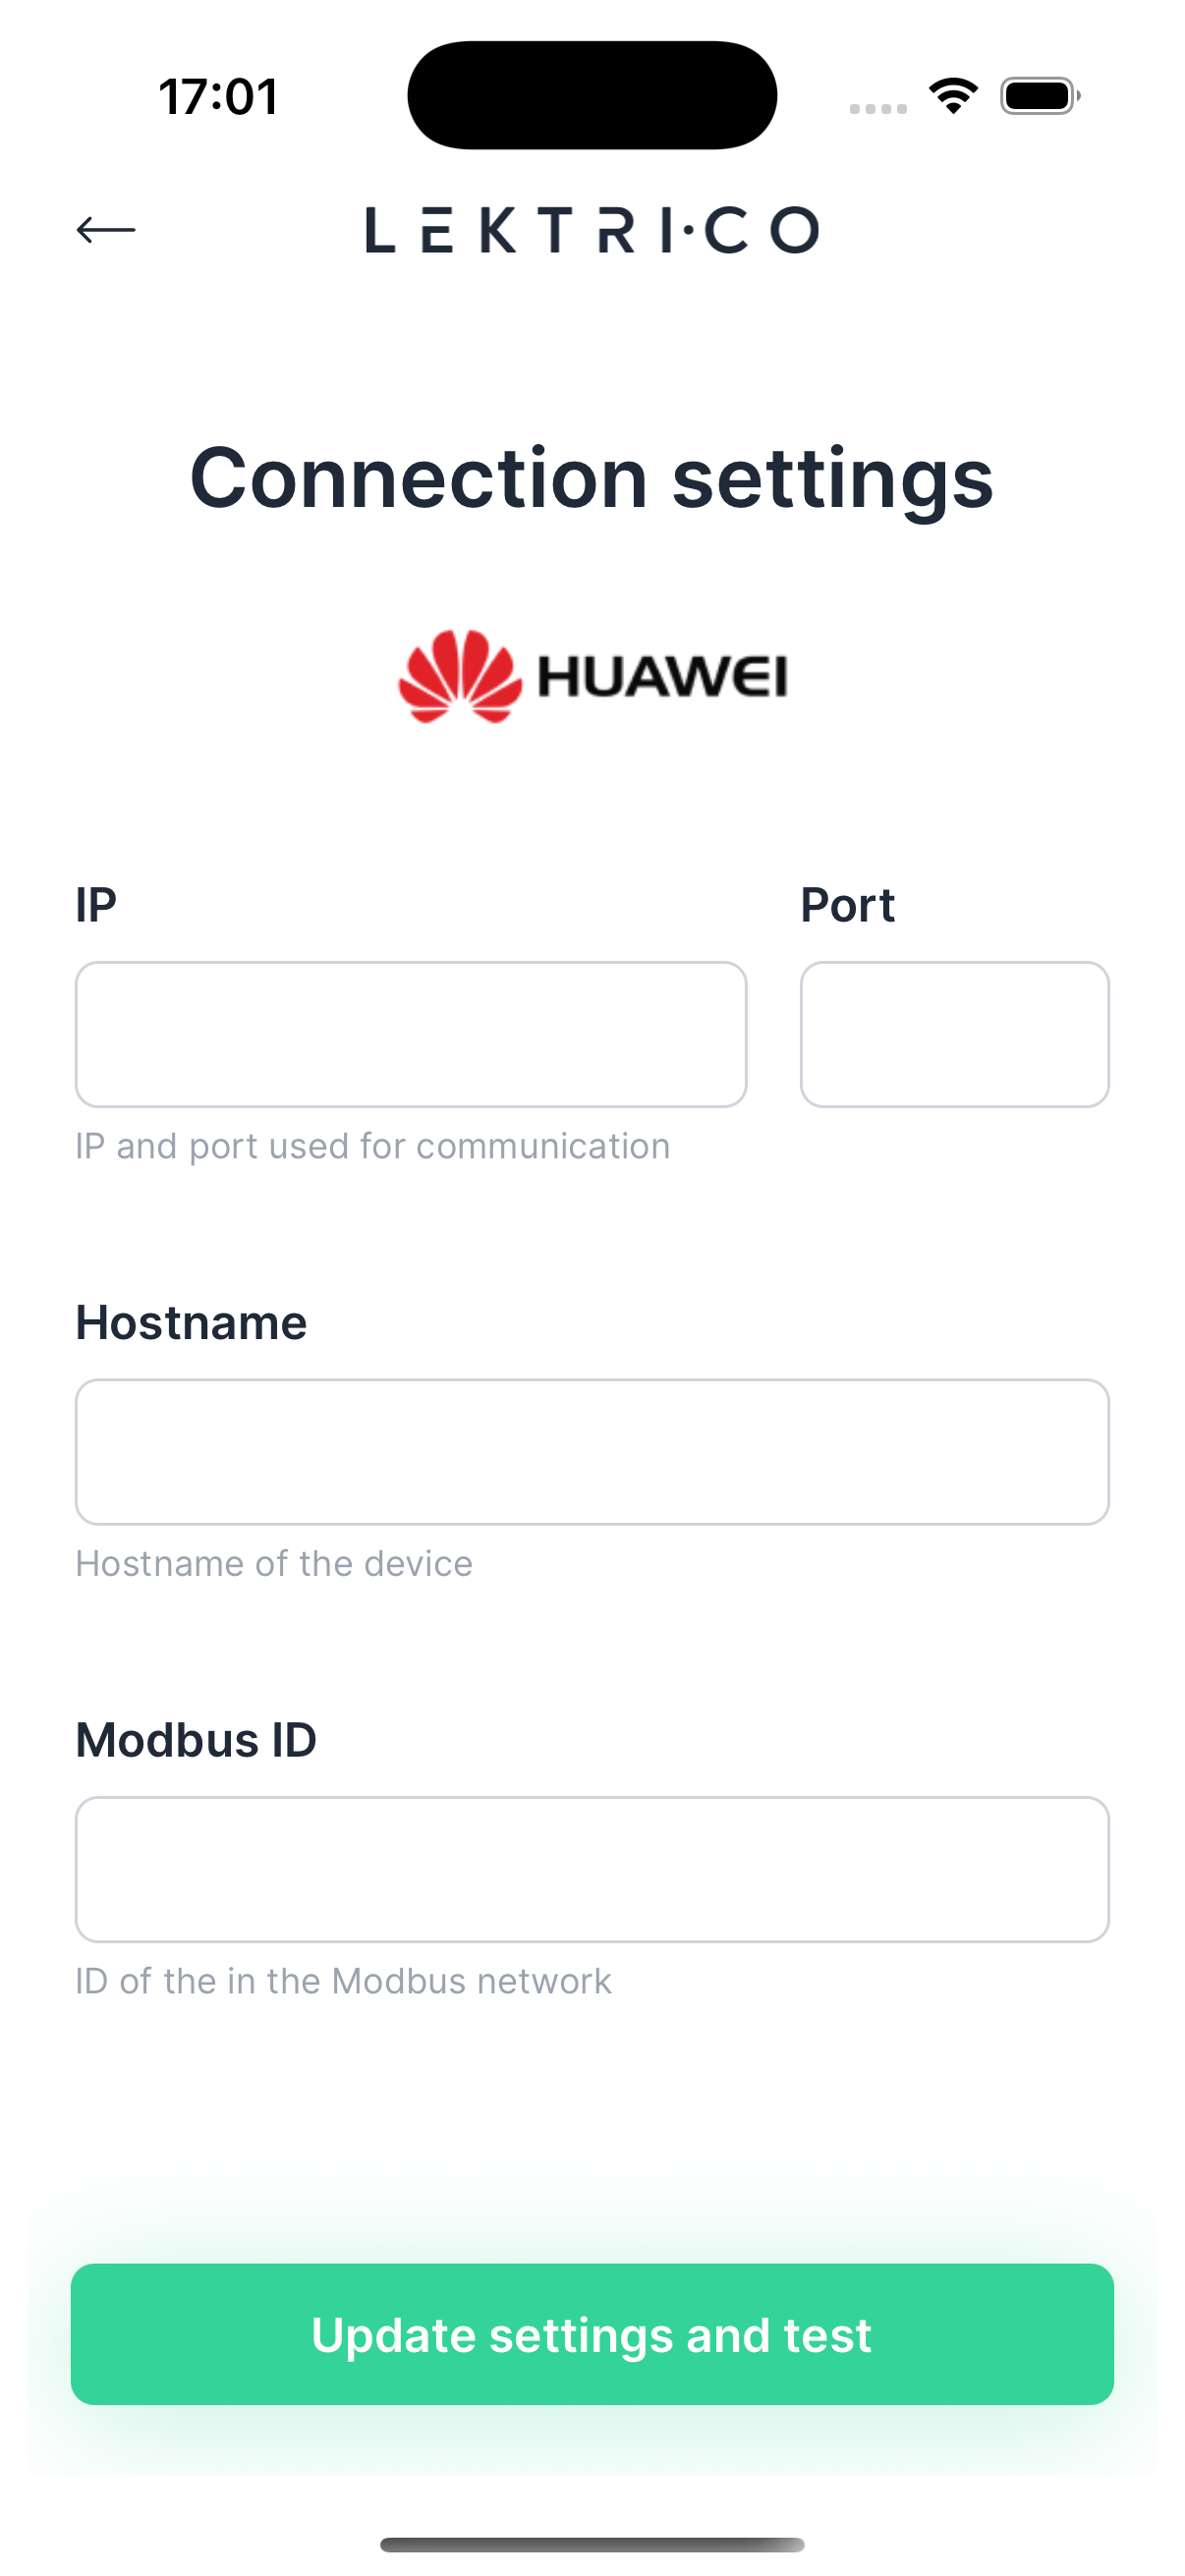
Connection Settings
Configure the connection parameters for your selected device. The required fields vary depending on the device type.
Shelly
Configuration fields:
- IP address
Alfa
Configuration fields:
- IP address and Port
- Modbus ID

Huawei
Configuration fields:
- IP address and Port
- Modbus ID
- Hostname
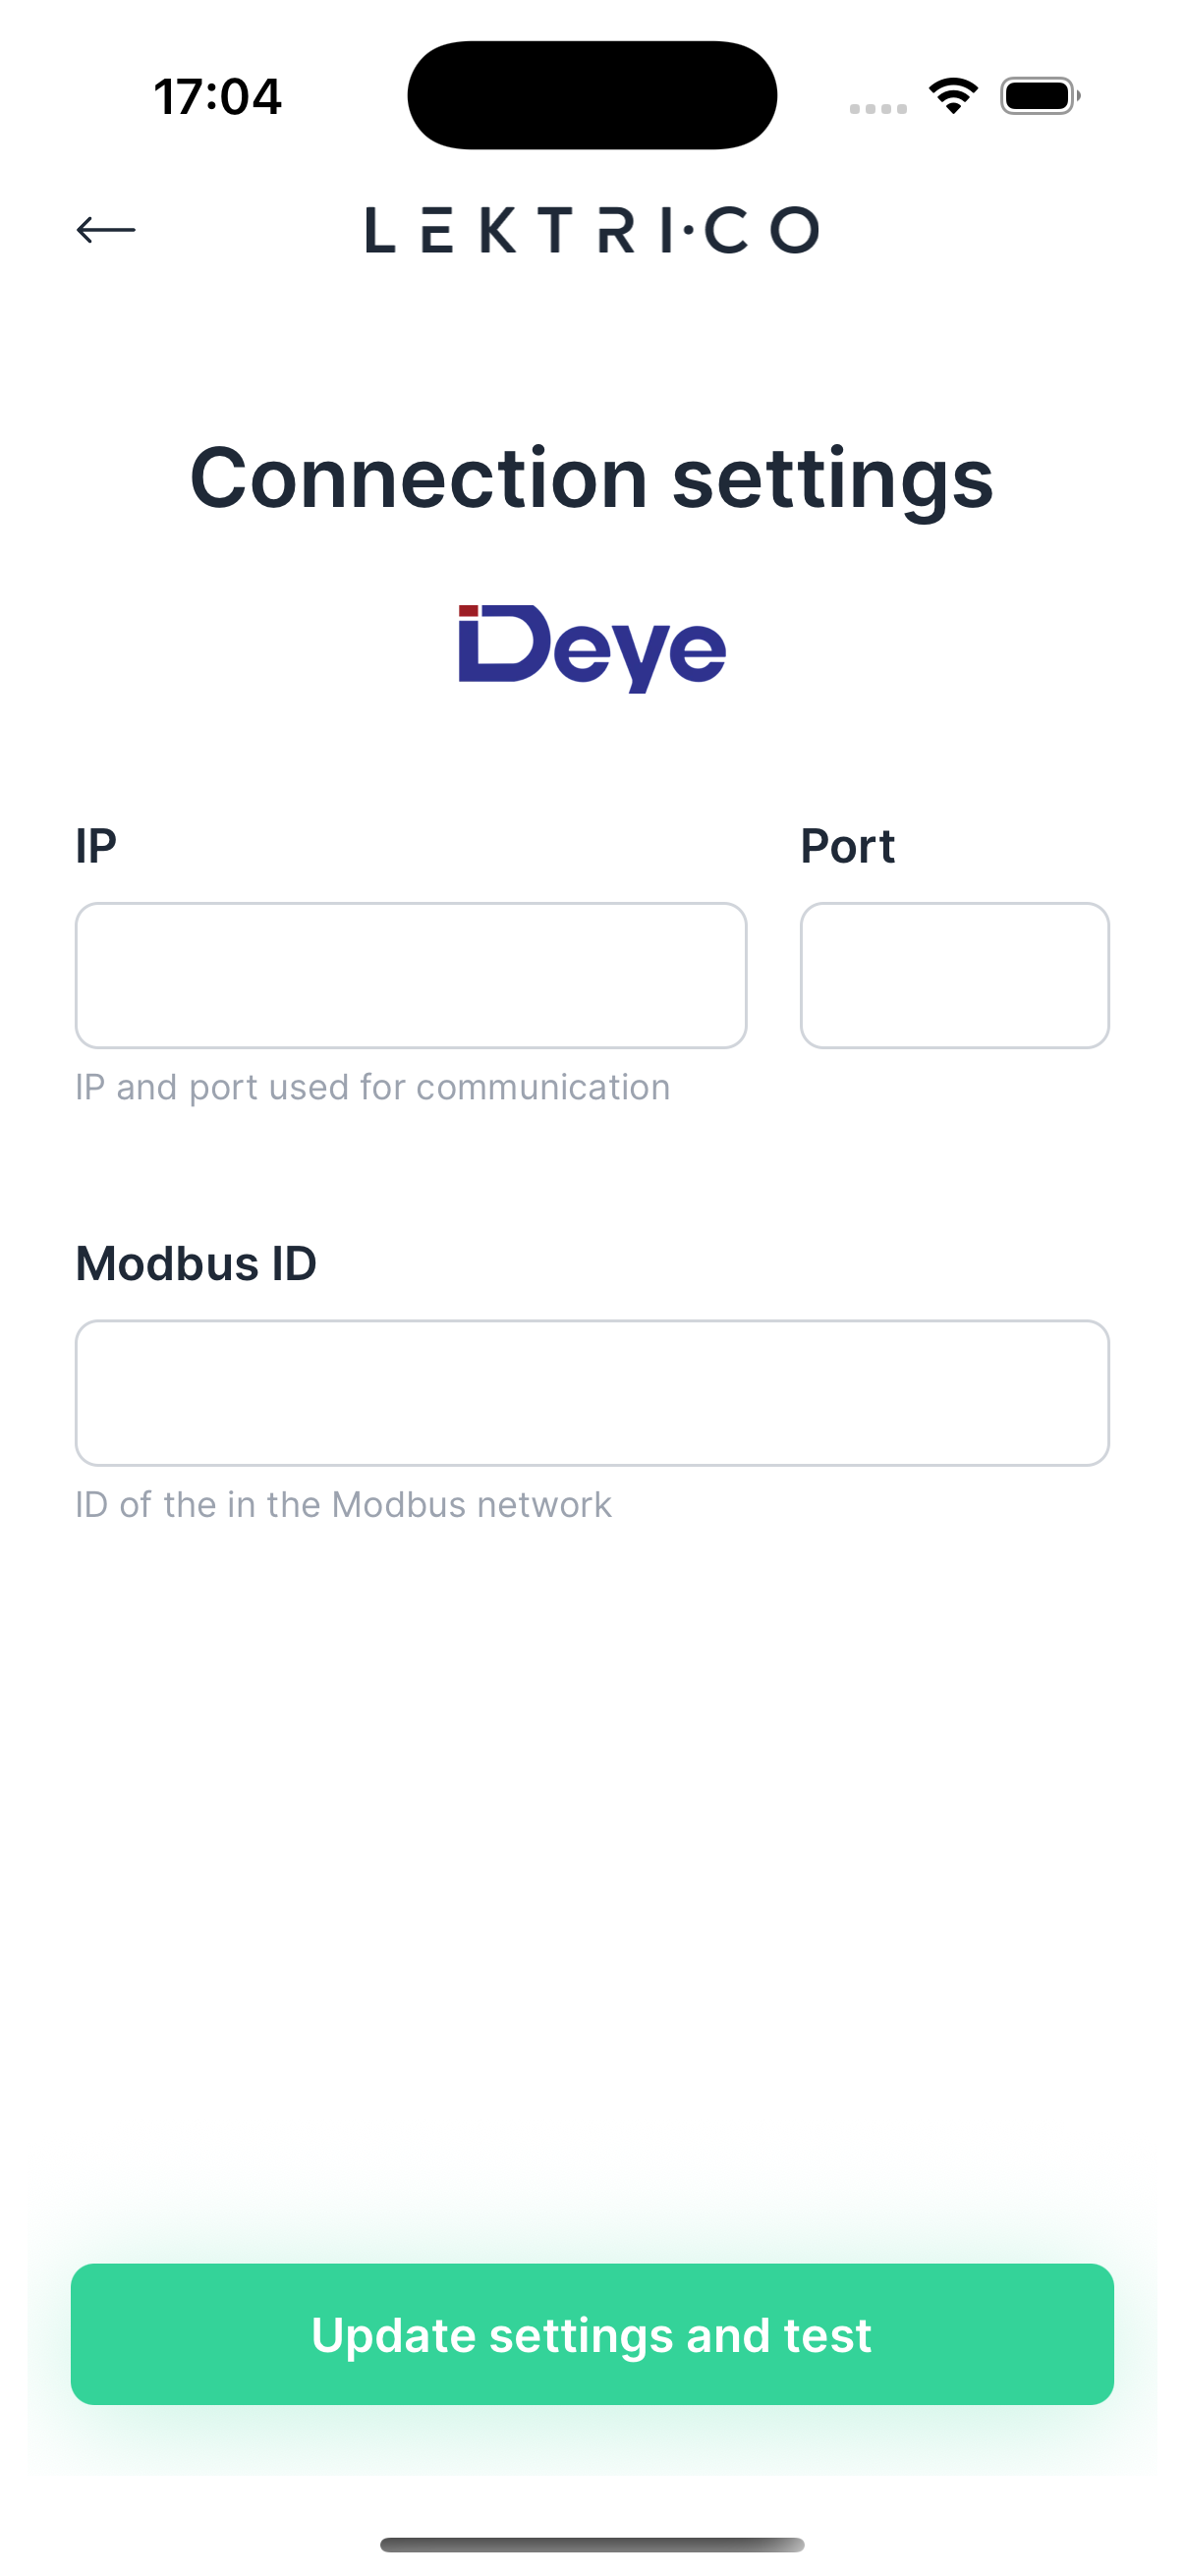
Deye
Configuration fields:
- IP address and Port
- Modbus ID
SolarEdge
Configuration fields:
- IP address and Port
- Modbus ID
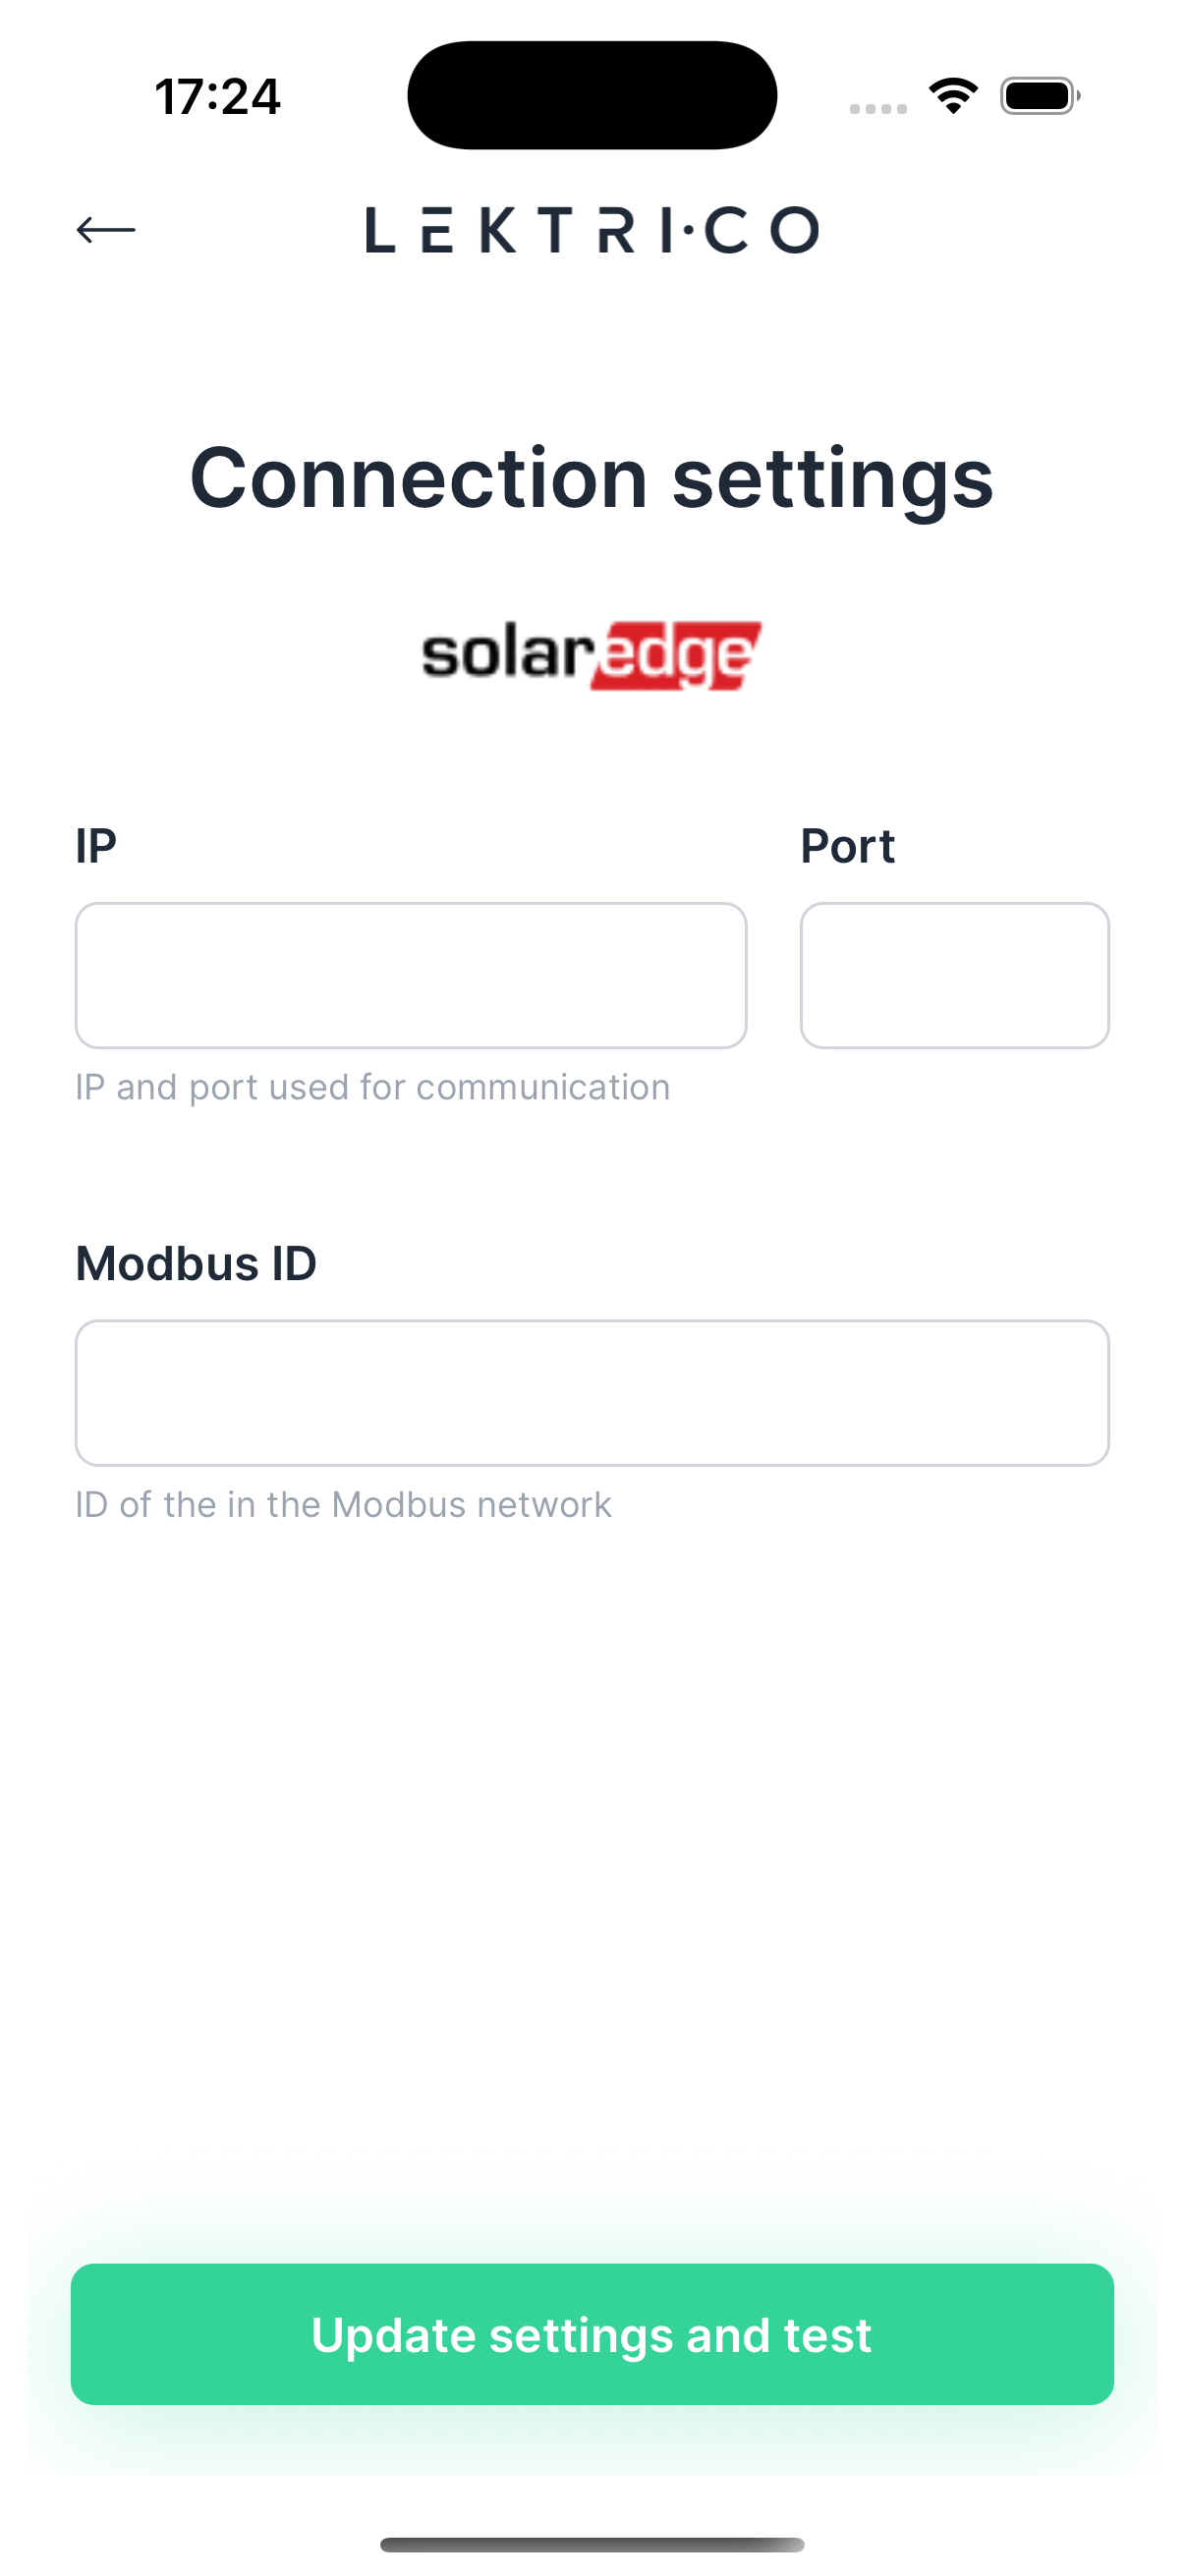
1. Enter the connection parameters for your device.
2. Tap "Update settings and test" to verify the connection.
> NOTE: Tap the info link "More info about how the implementation works and how to setup can be found here" for detailed device-specific setup instructions.
---
Test Integration
The app verifies communication with your external device and displays the test results.
The connection check screen shows the verification progress.
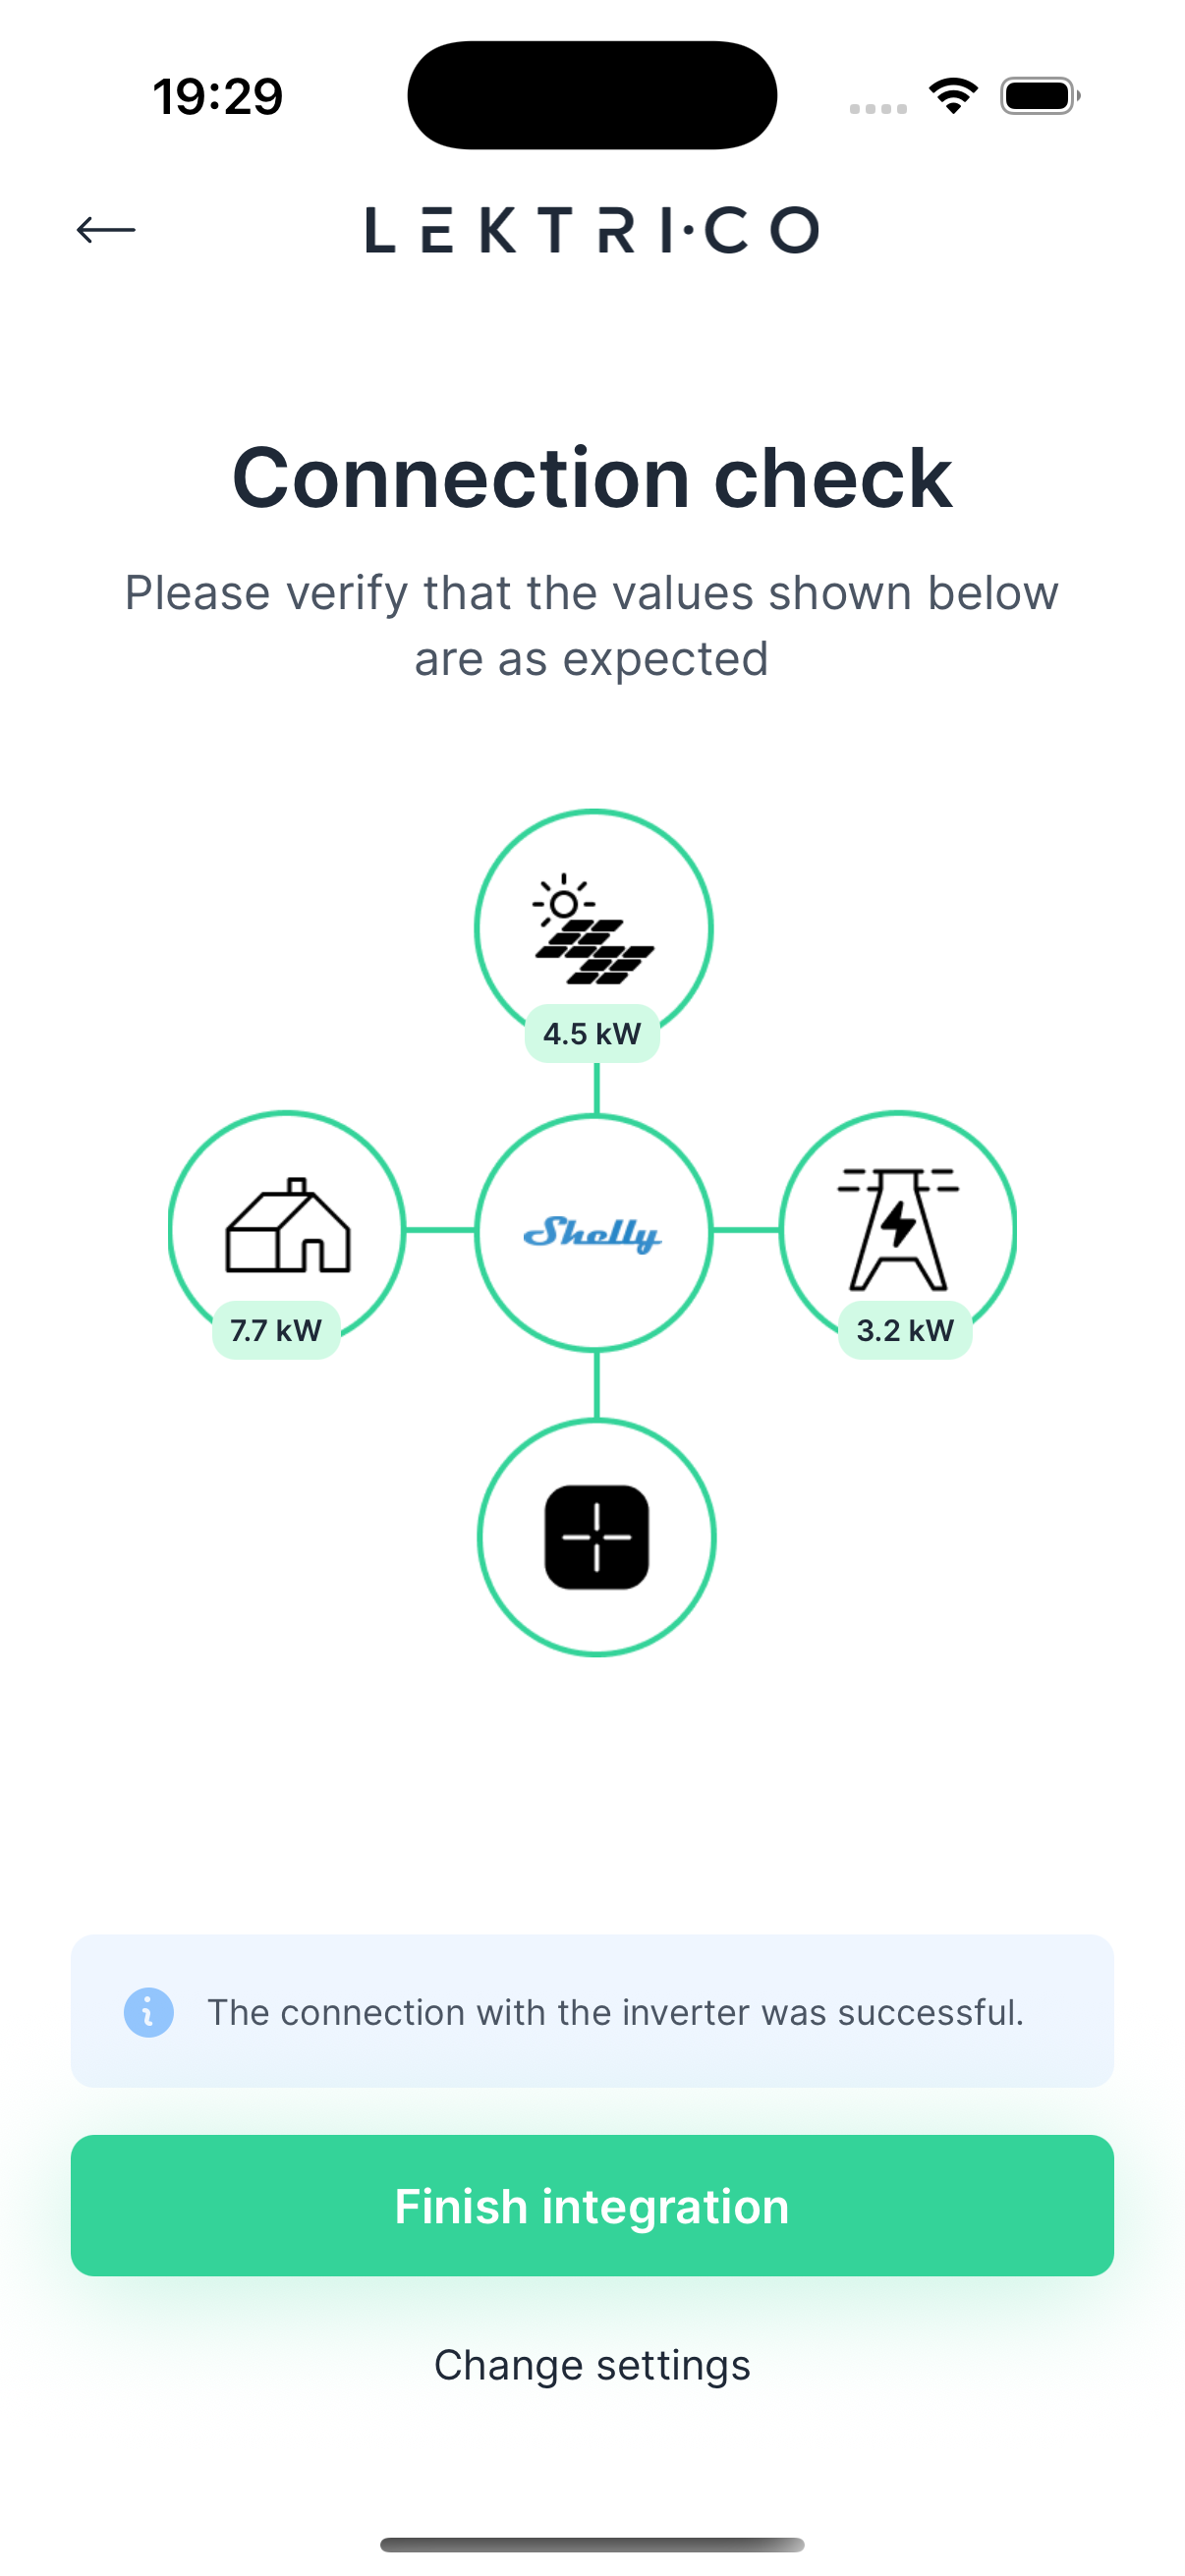
On success: "The connection with the inverter was successful." The screen displays current values.
1. Tap "Finish integration" to complete the setup.
On failure: "Could not communicate with device. Make sure it is properly connected or is not misconfigured!"
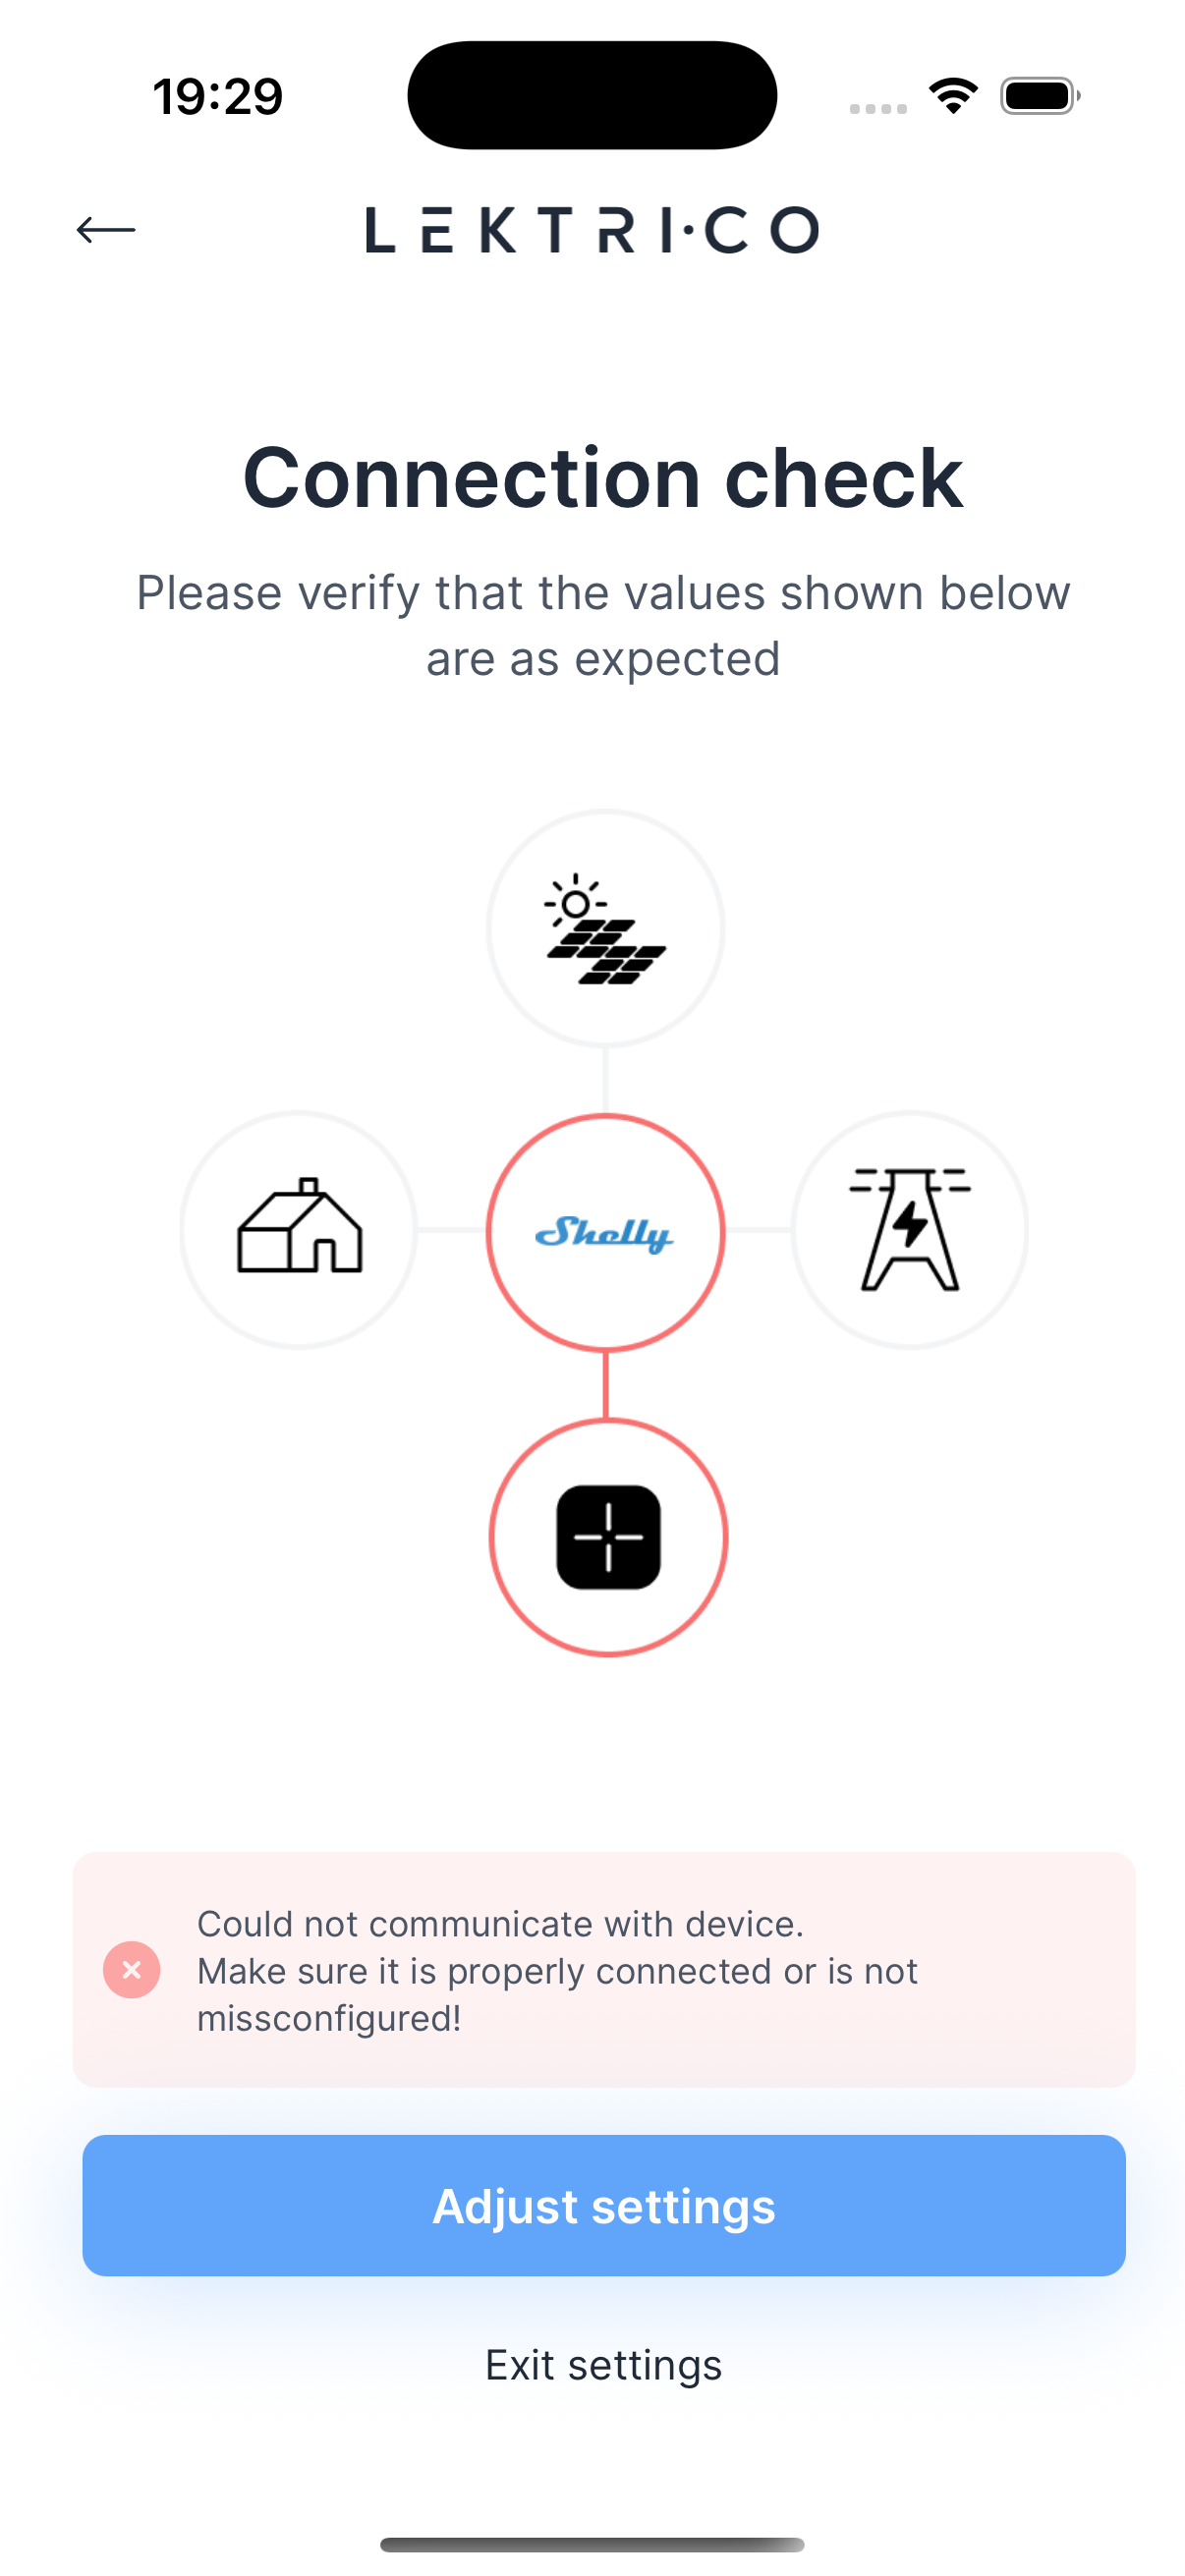
1. Tap "Adjust settings" or "Change settings" to correct the configuration.
2. Verify the device is powered on and connected to the same network.
3. Re-run the connection test.
> WARNING: Double-check your IP address, port, and Modbus ID values. Incorrect parameters are the most common cause of connection failures.
---
Breaker Rating Configuration
Set your home's grid connection rating to match your main circuit breaker. The load balancing algorithm uses this value to keep total power consumption below your installation's limit.
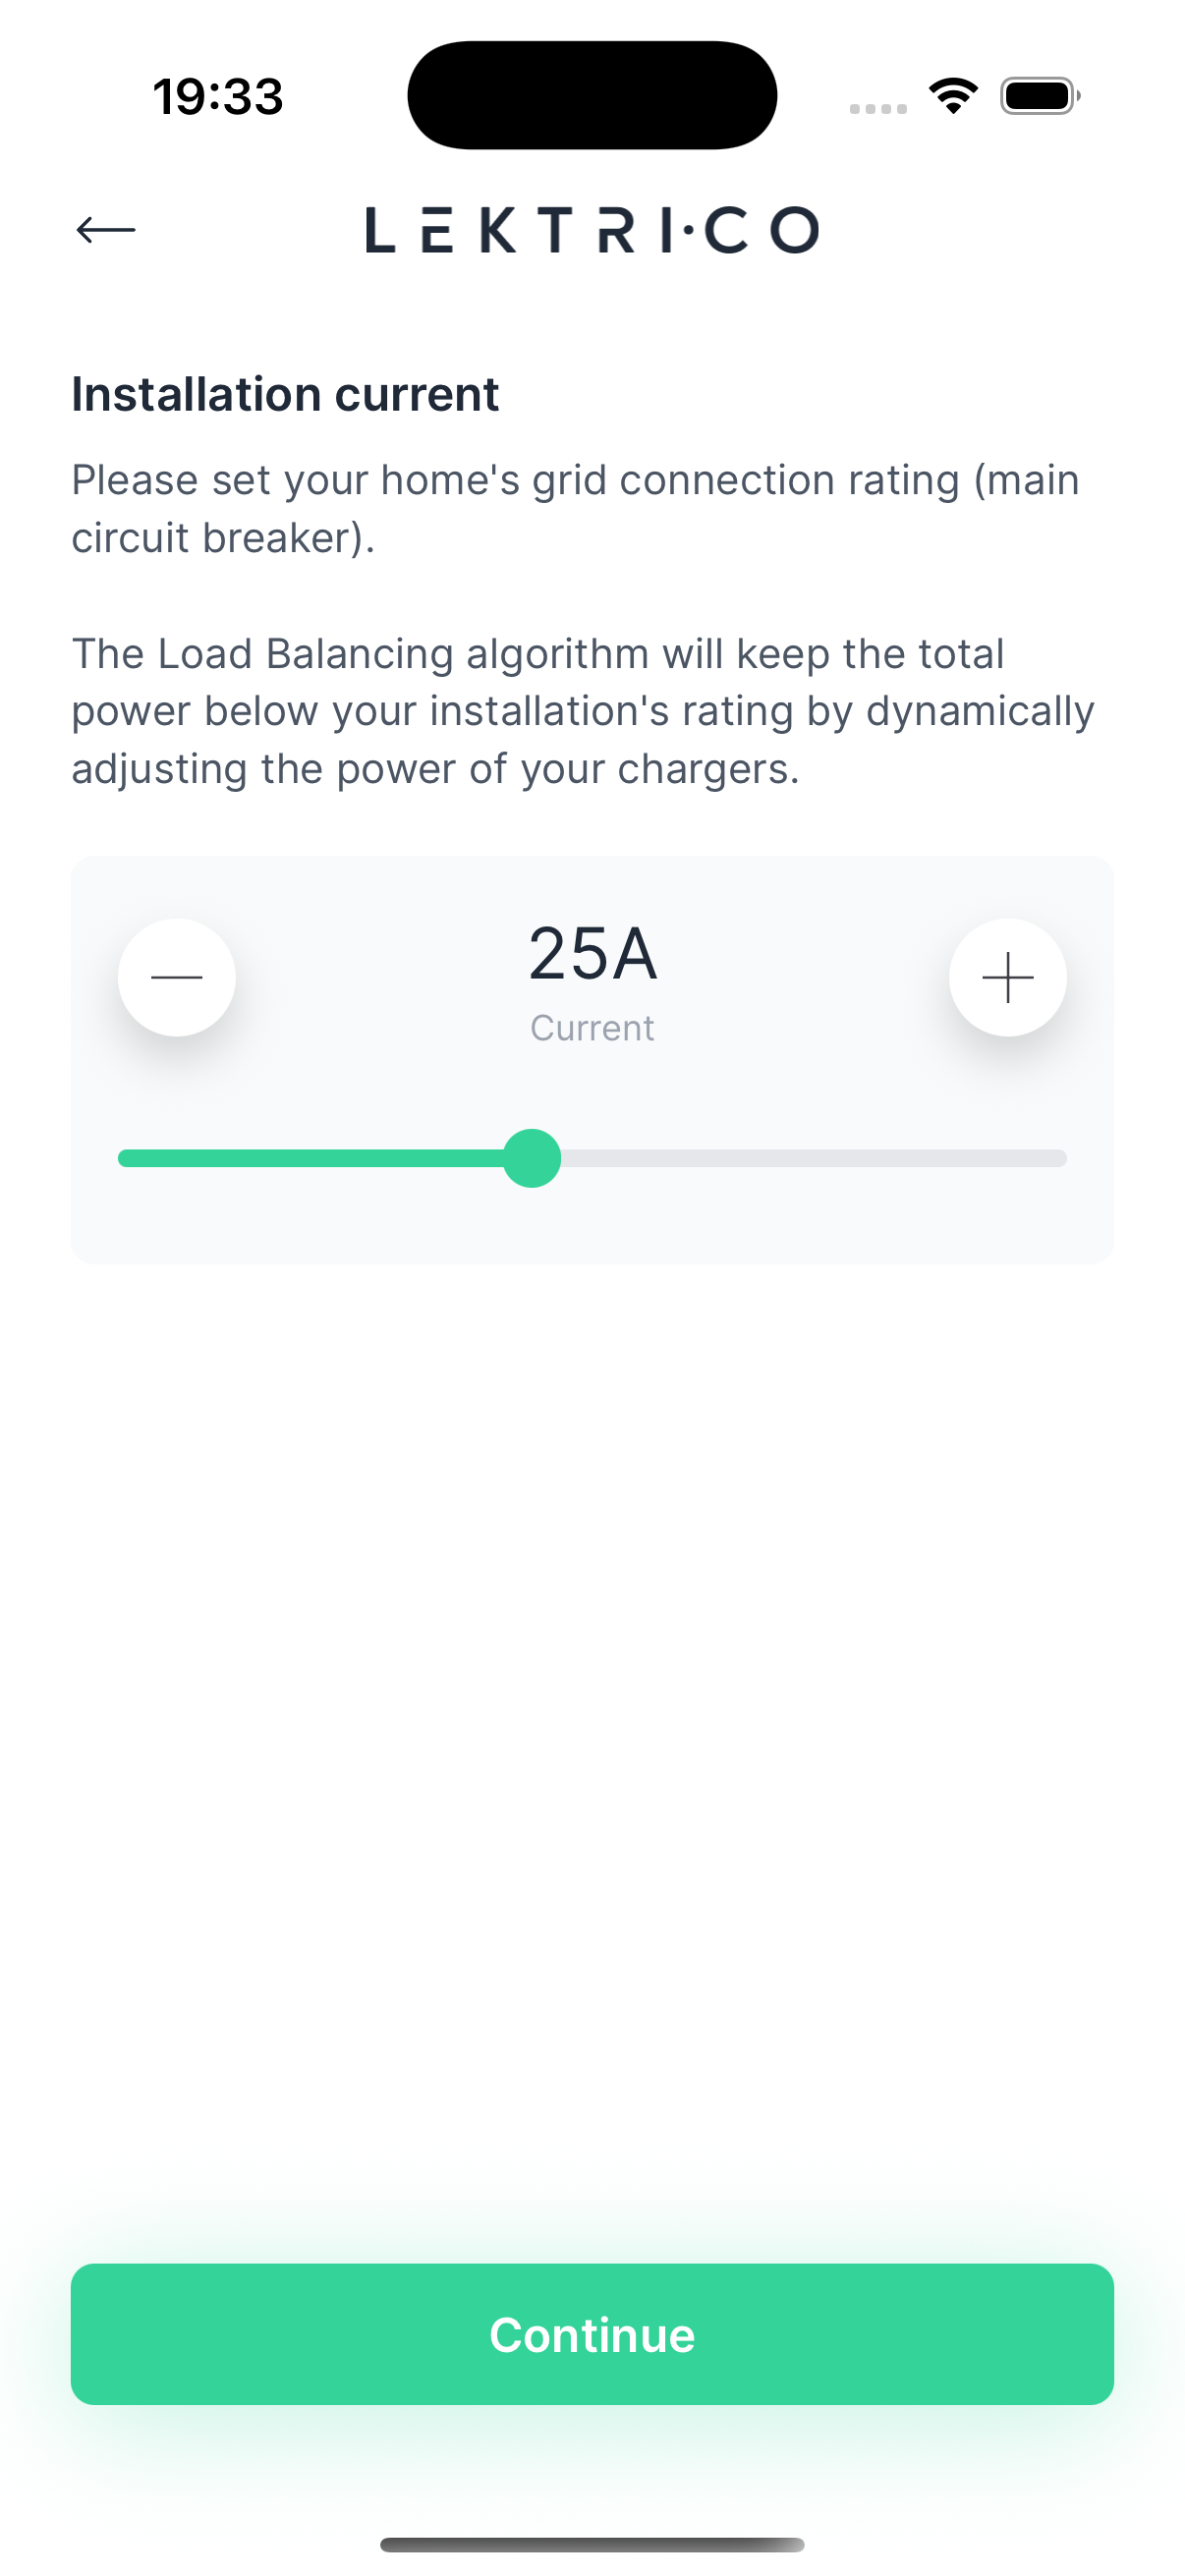
1. Select the amperage that matches your main circuit breaker.
2. Tap "Continue" to proceed.
> WARNING: An incorrect breaker rating can compromise load balancing accuracy. Consult your electrician if you are unsure of your installation's rating.
---
Shelly-Specific WiFi Setup
This section applies only when integrating a Shelly EM that requires WiFi configuration before it can communicate with your LEKTRI.CO system.
Selecte configuration mode

Searching for Device
The app searches for Shelly EM access points in range. Keep your phone near the Shelly device.
Select Access Point
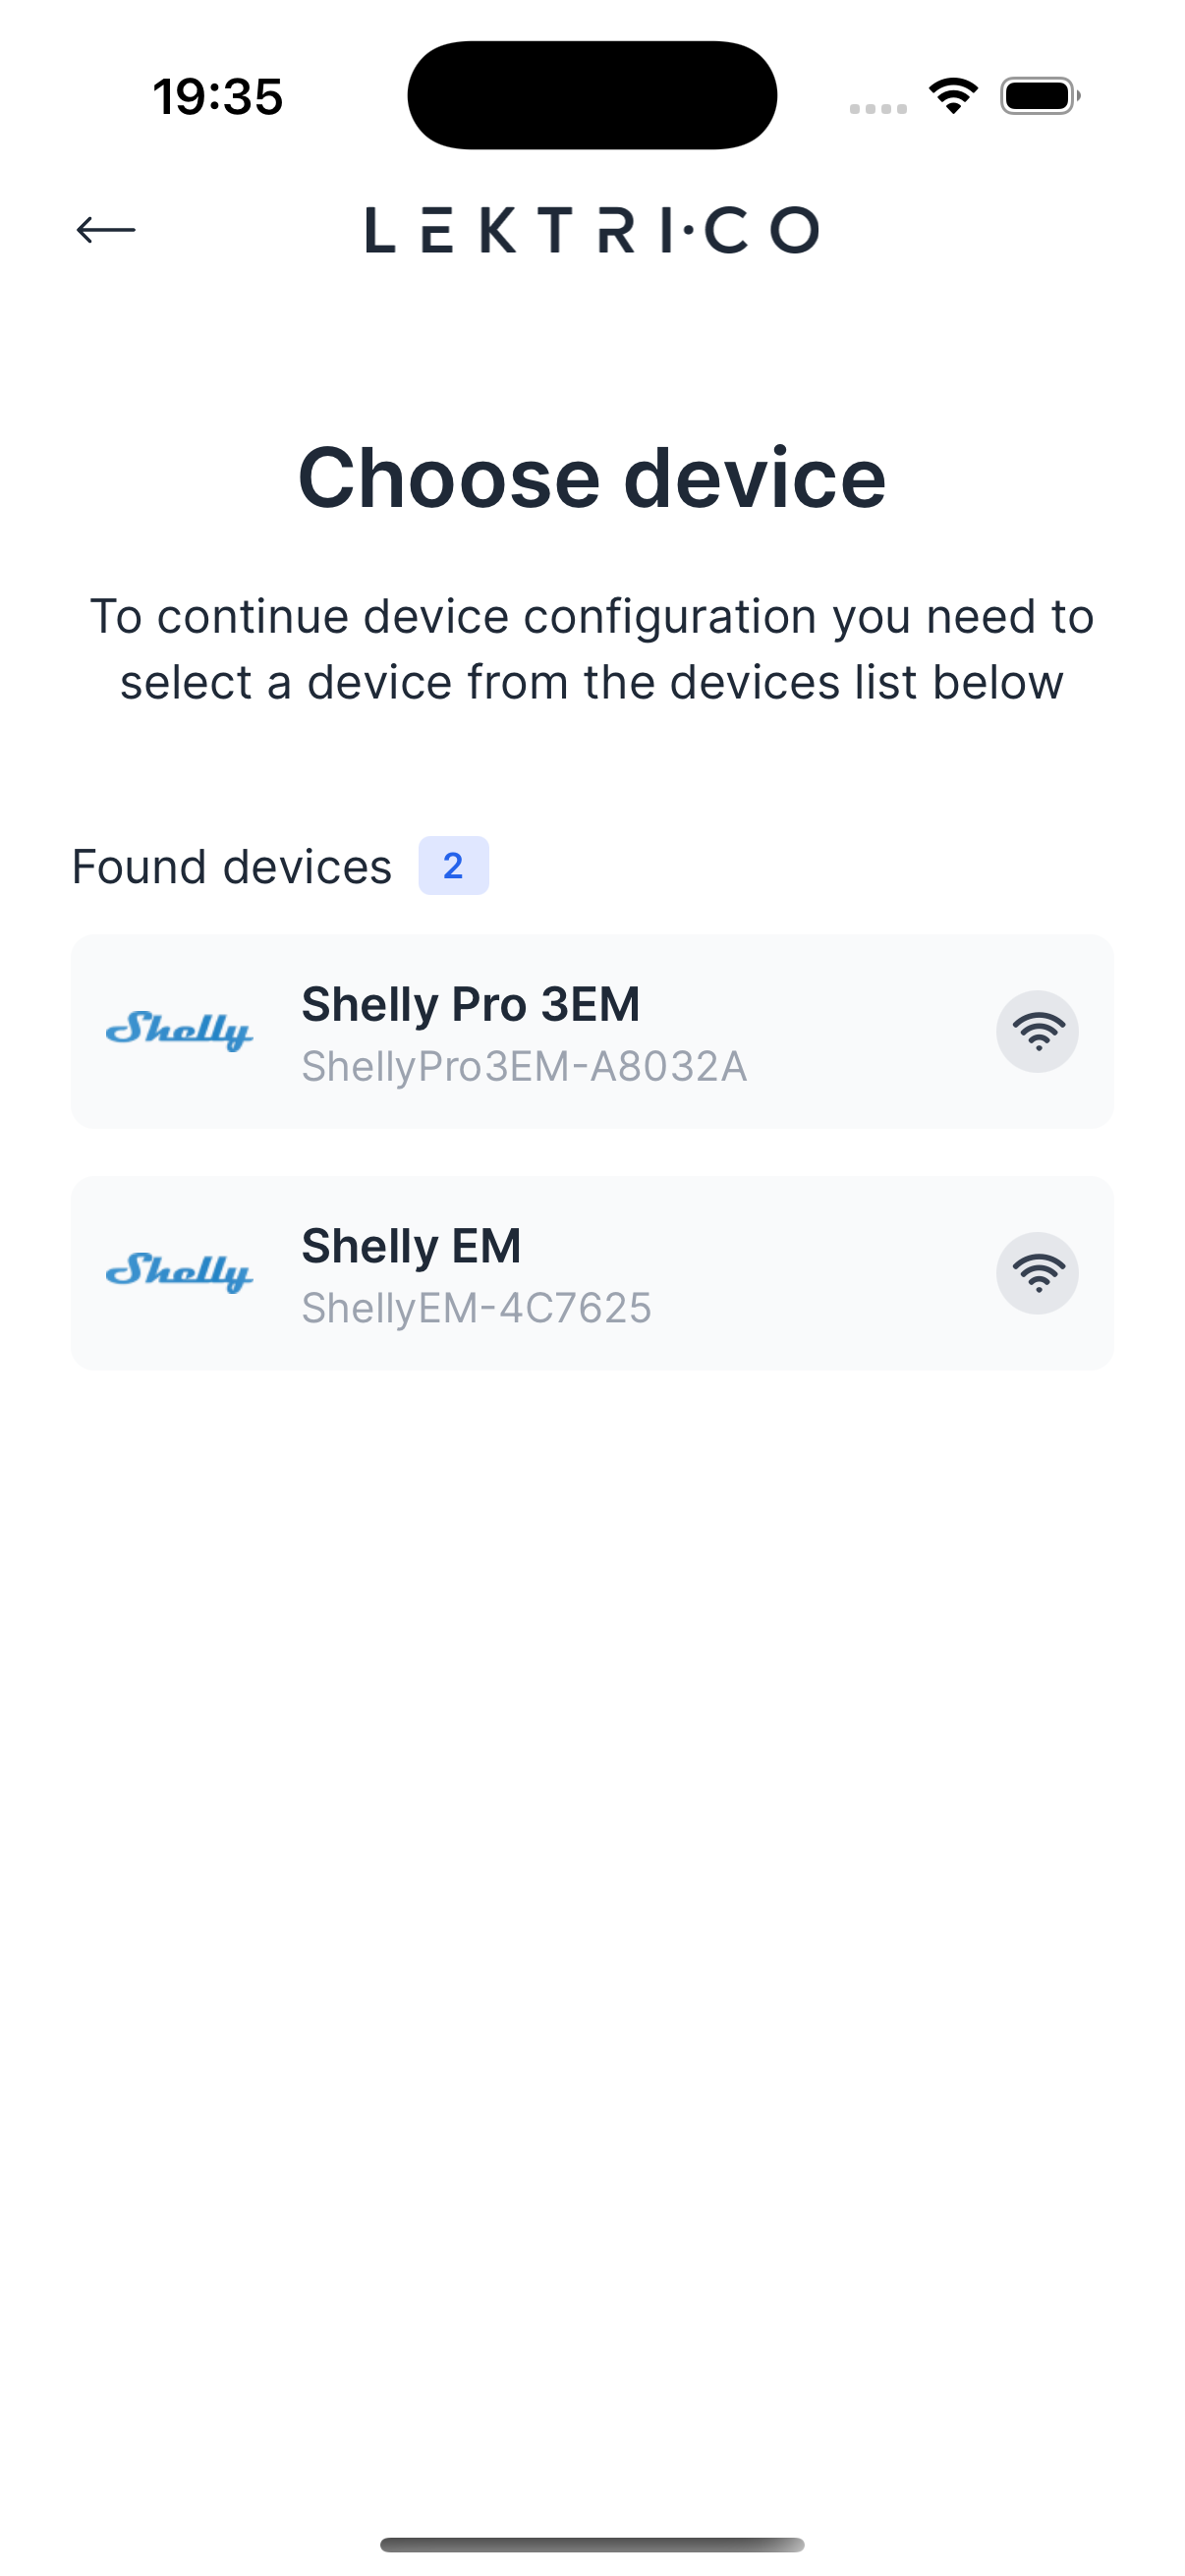
1. Choose your Shelly device from the list of found access points.
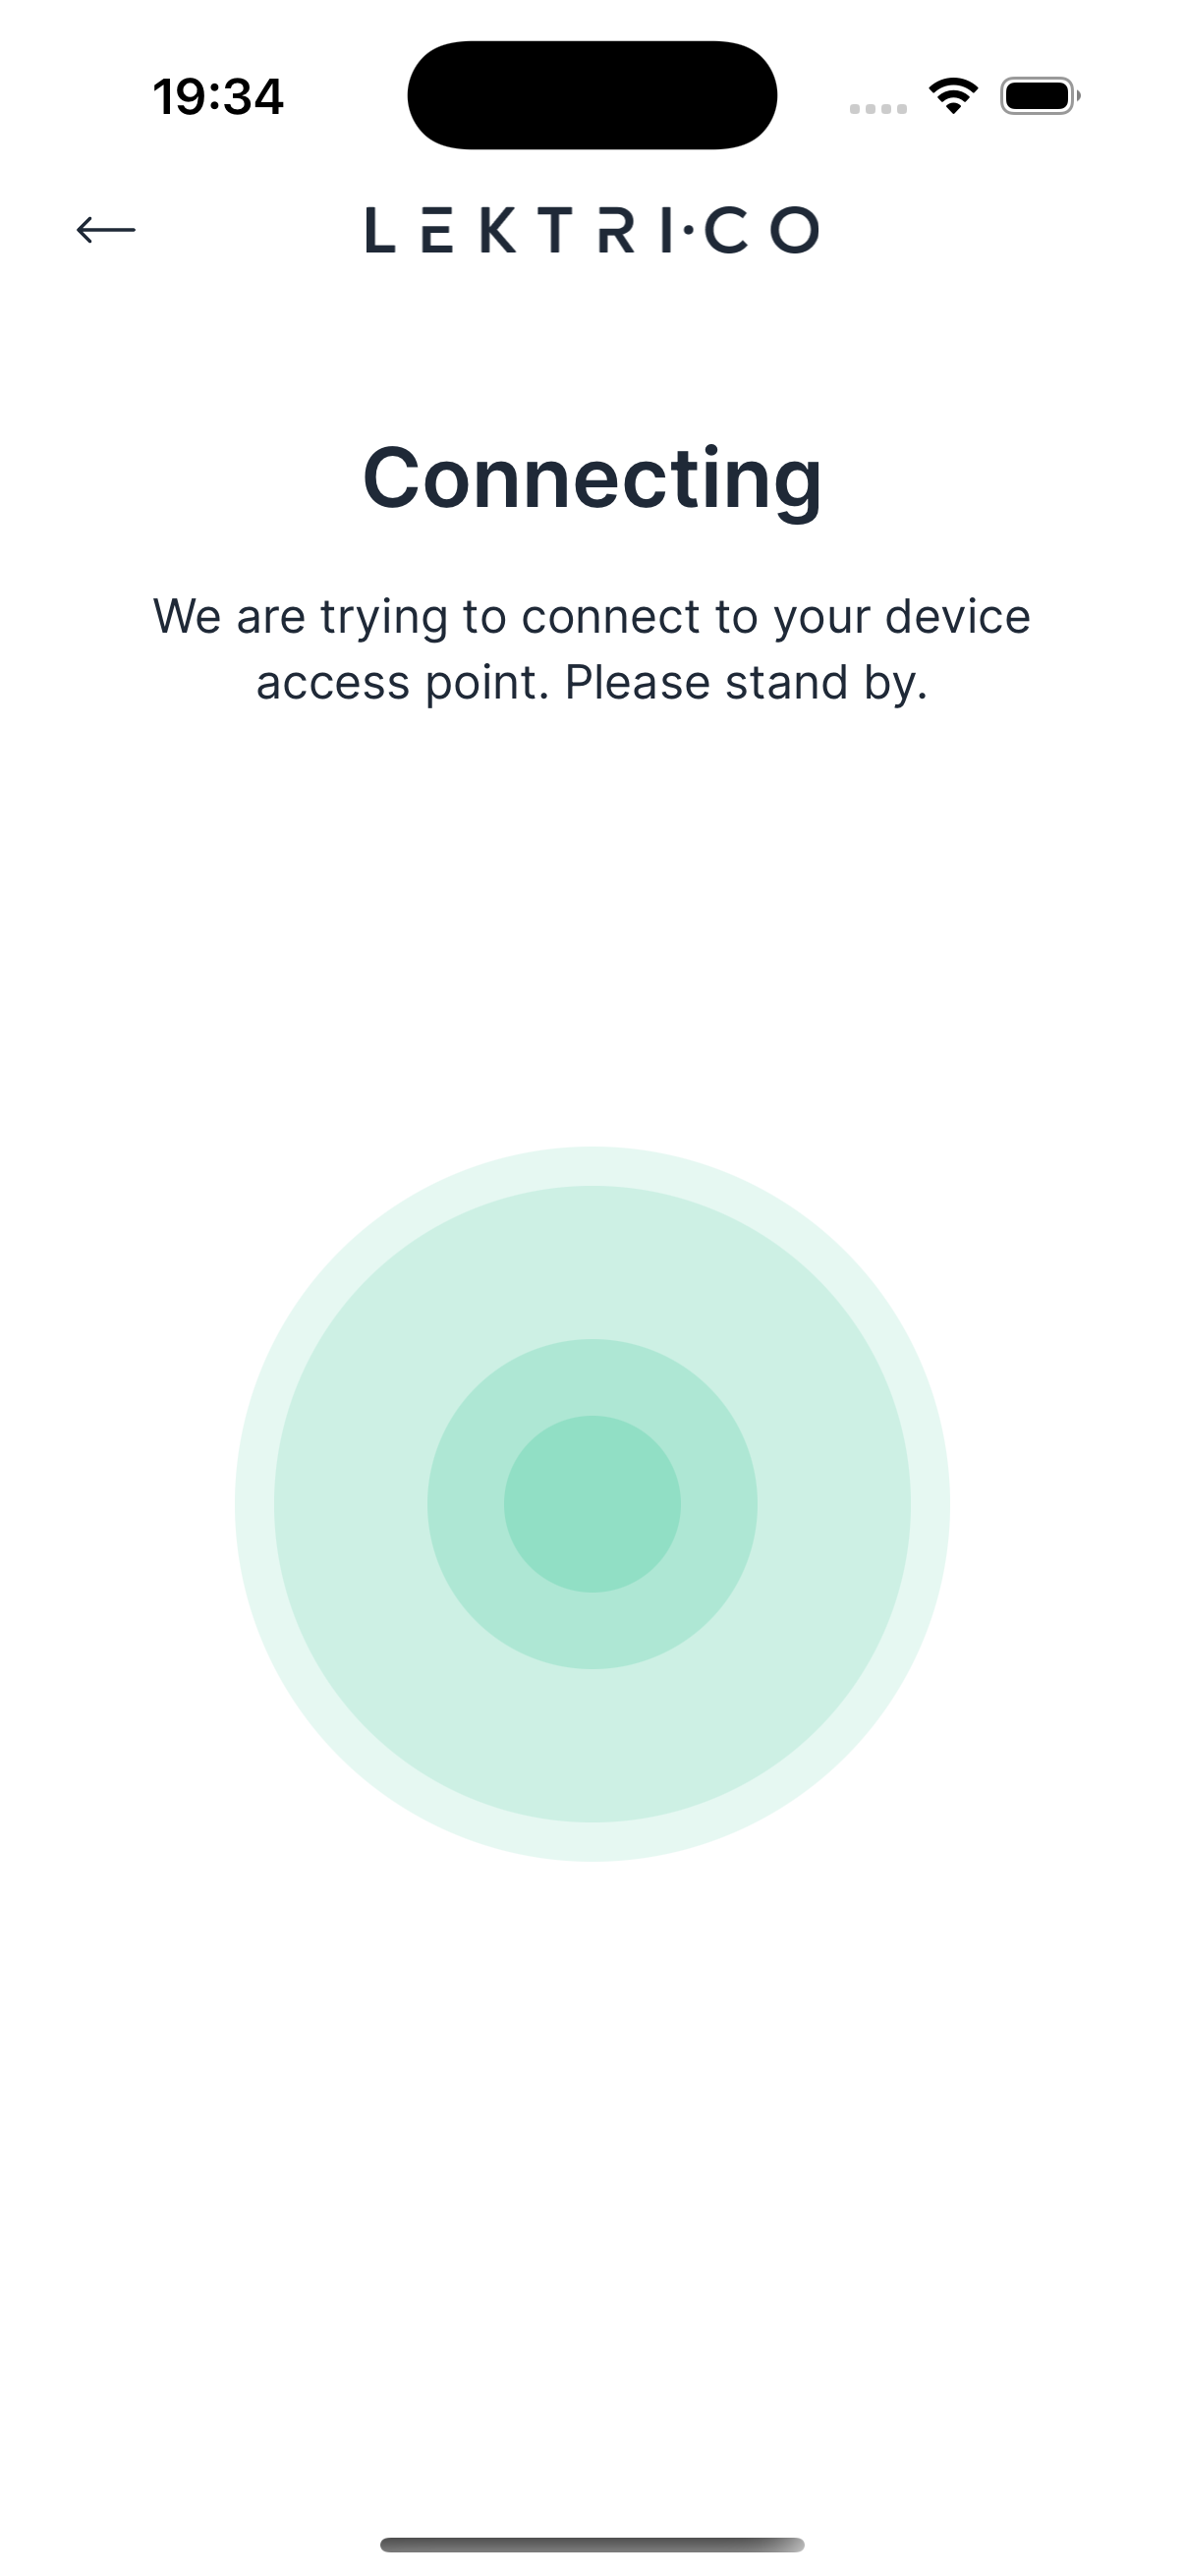
Connecting
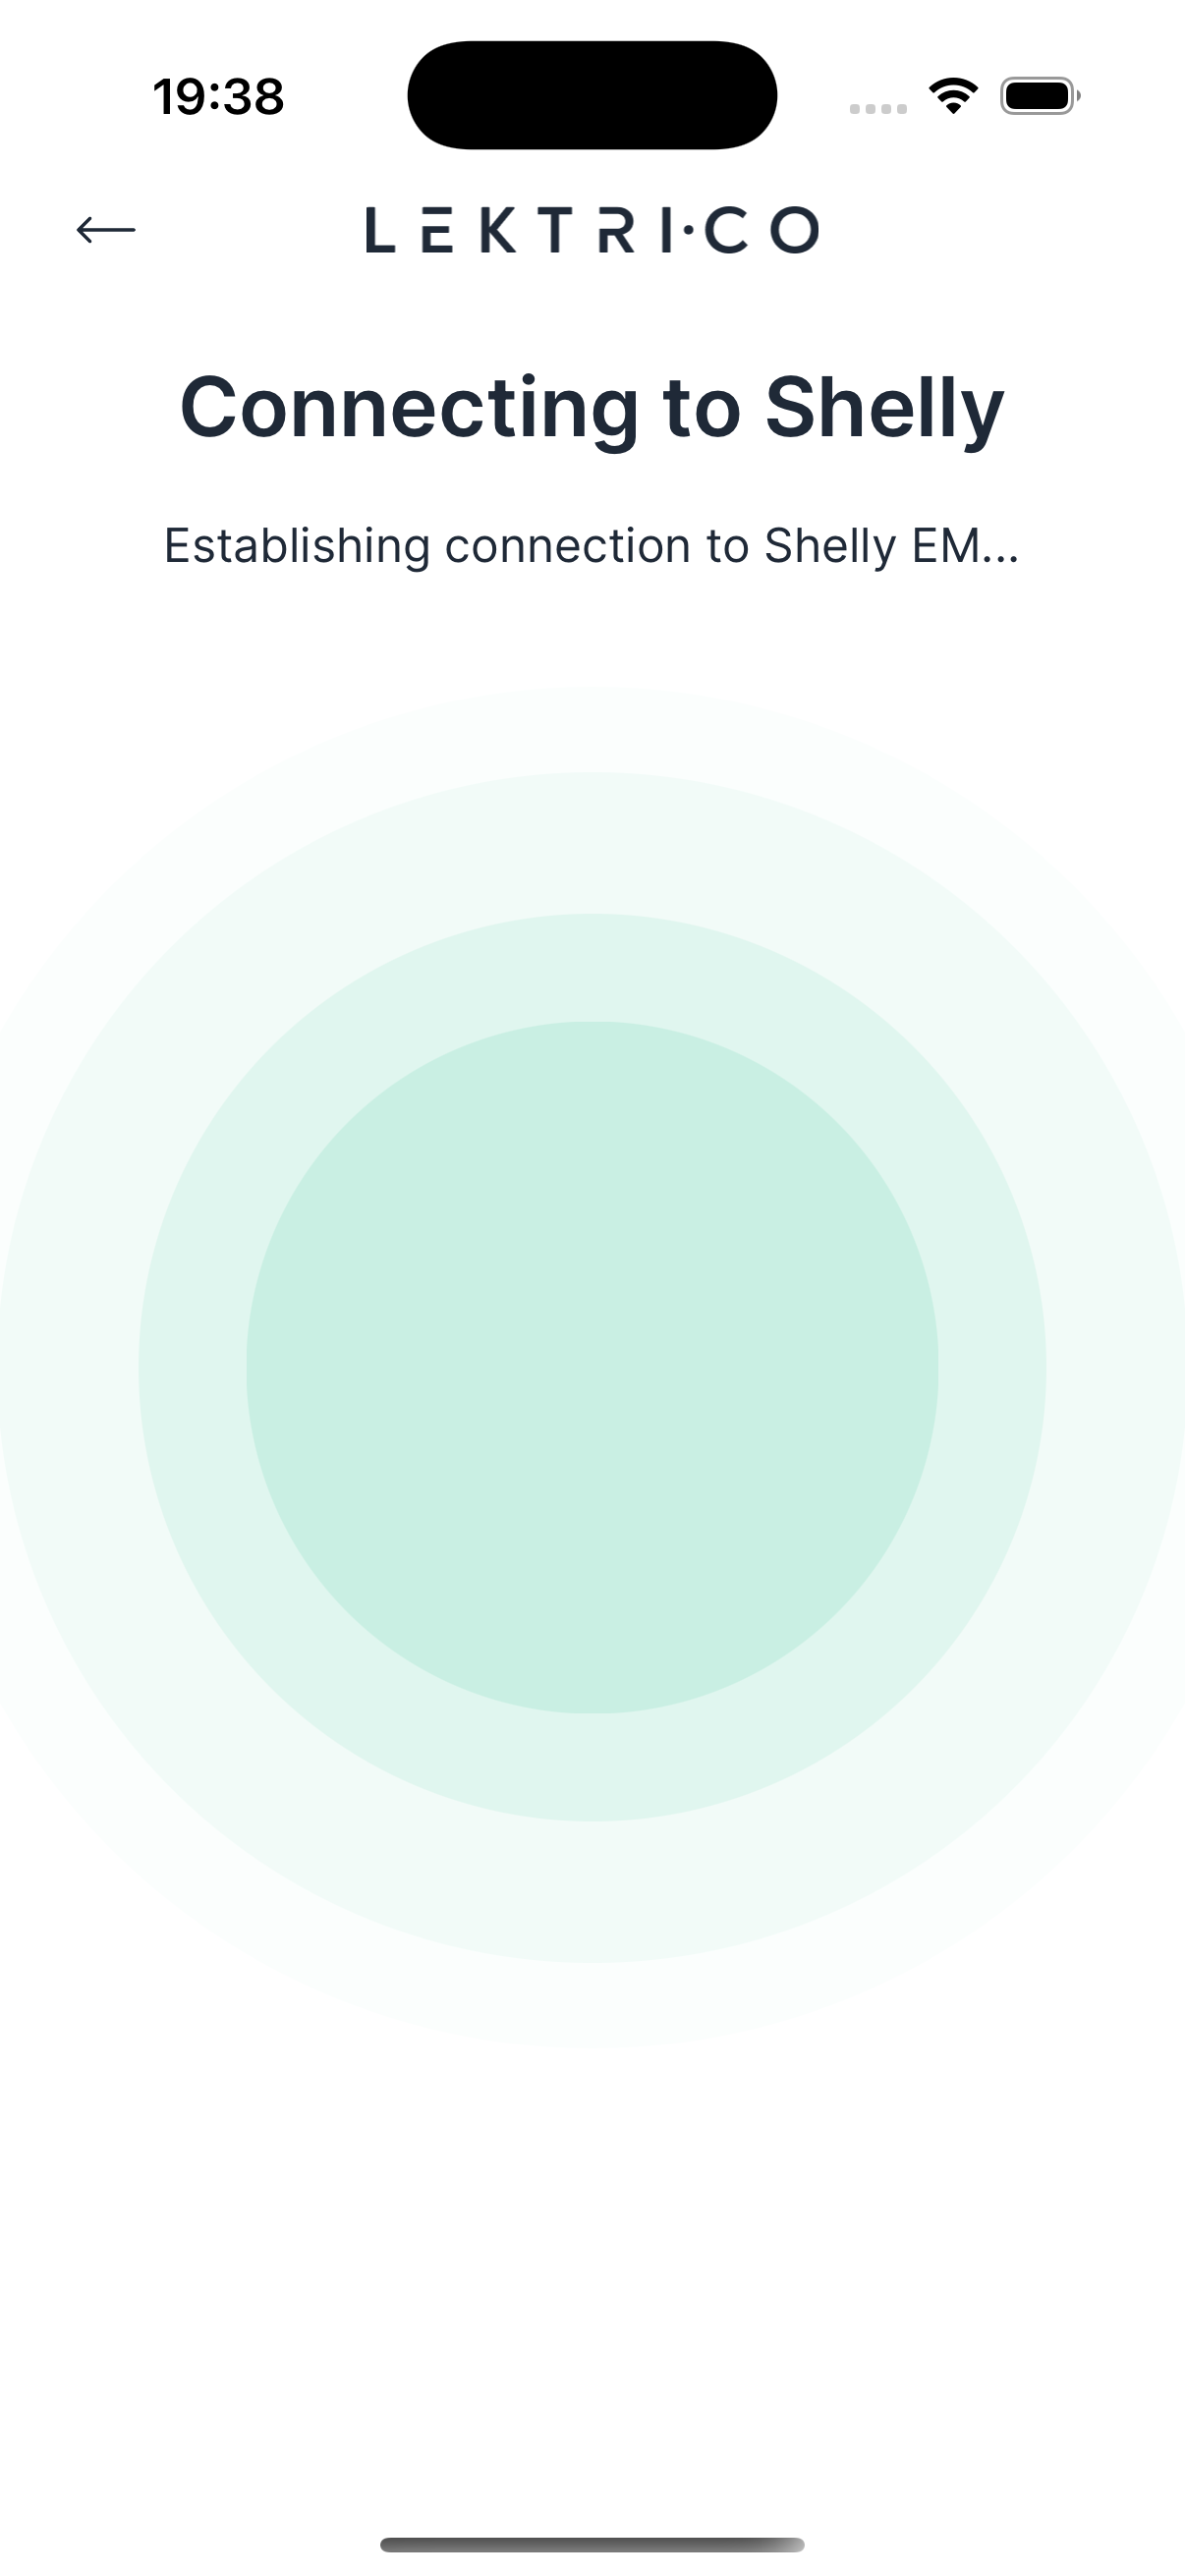
The app connects to the Shelly EM access point. Wait for the connection to be established.
Select WiFi Network
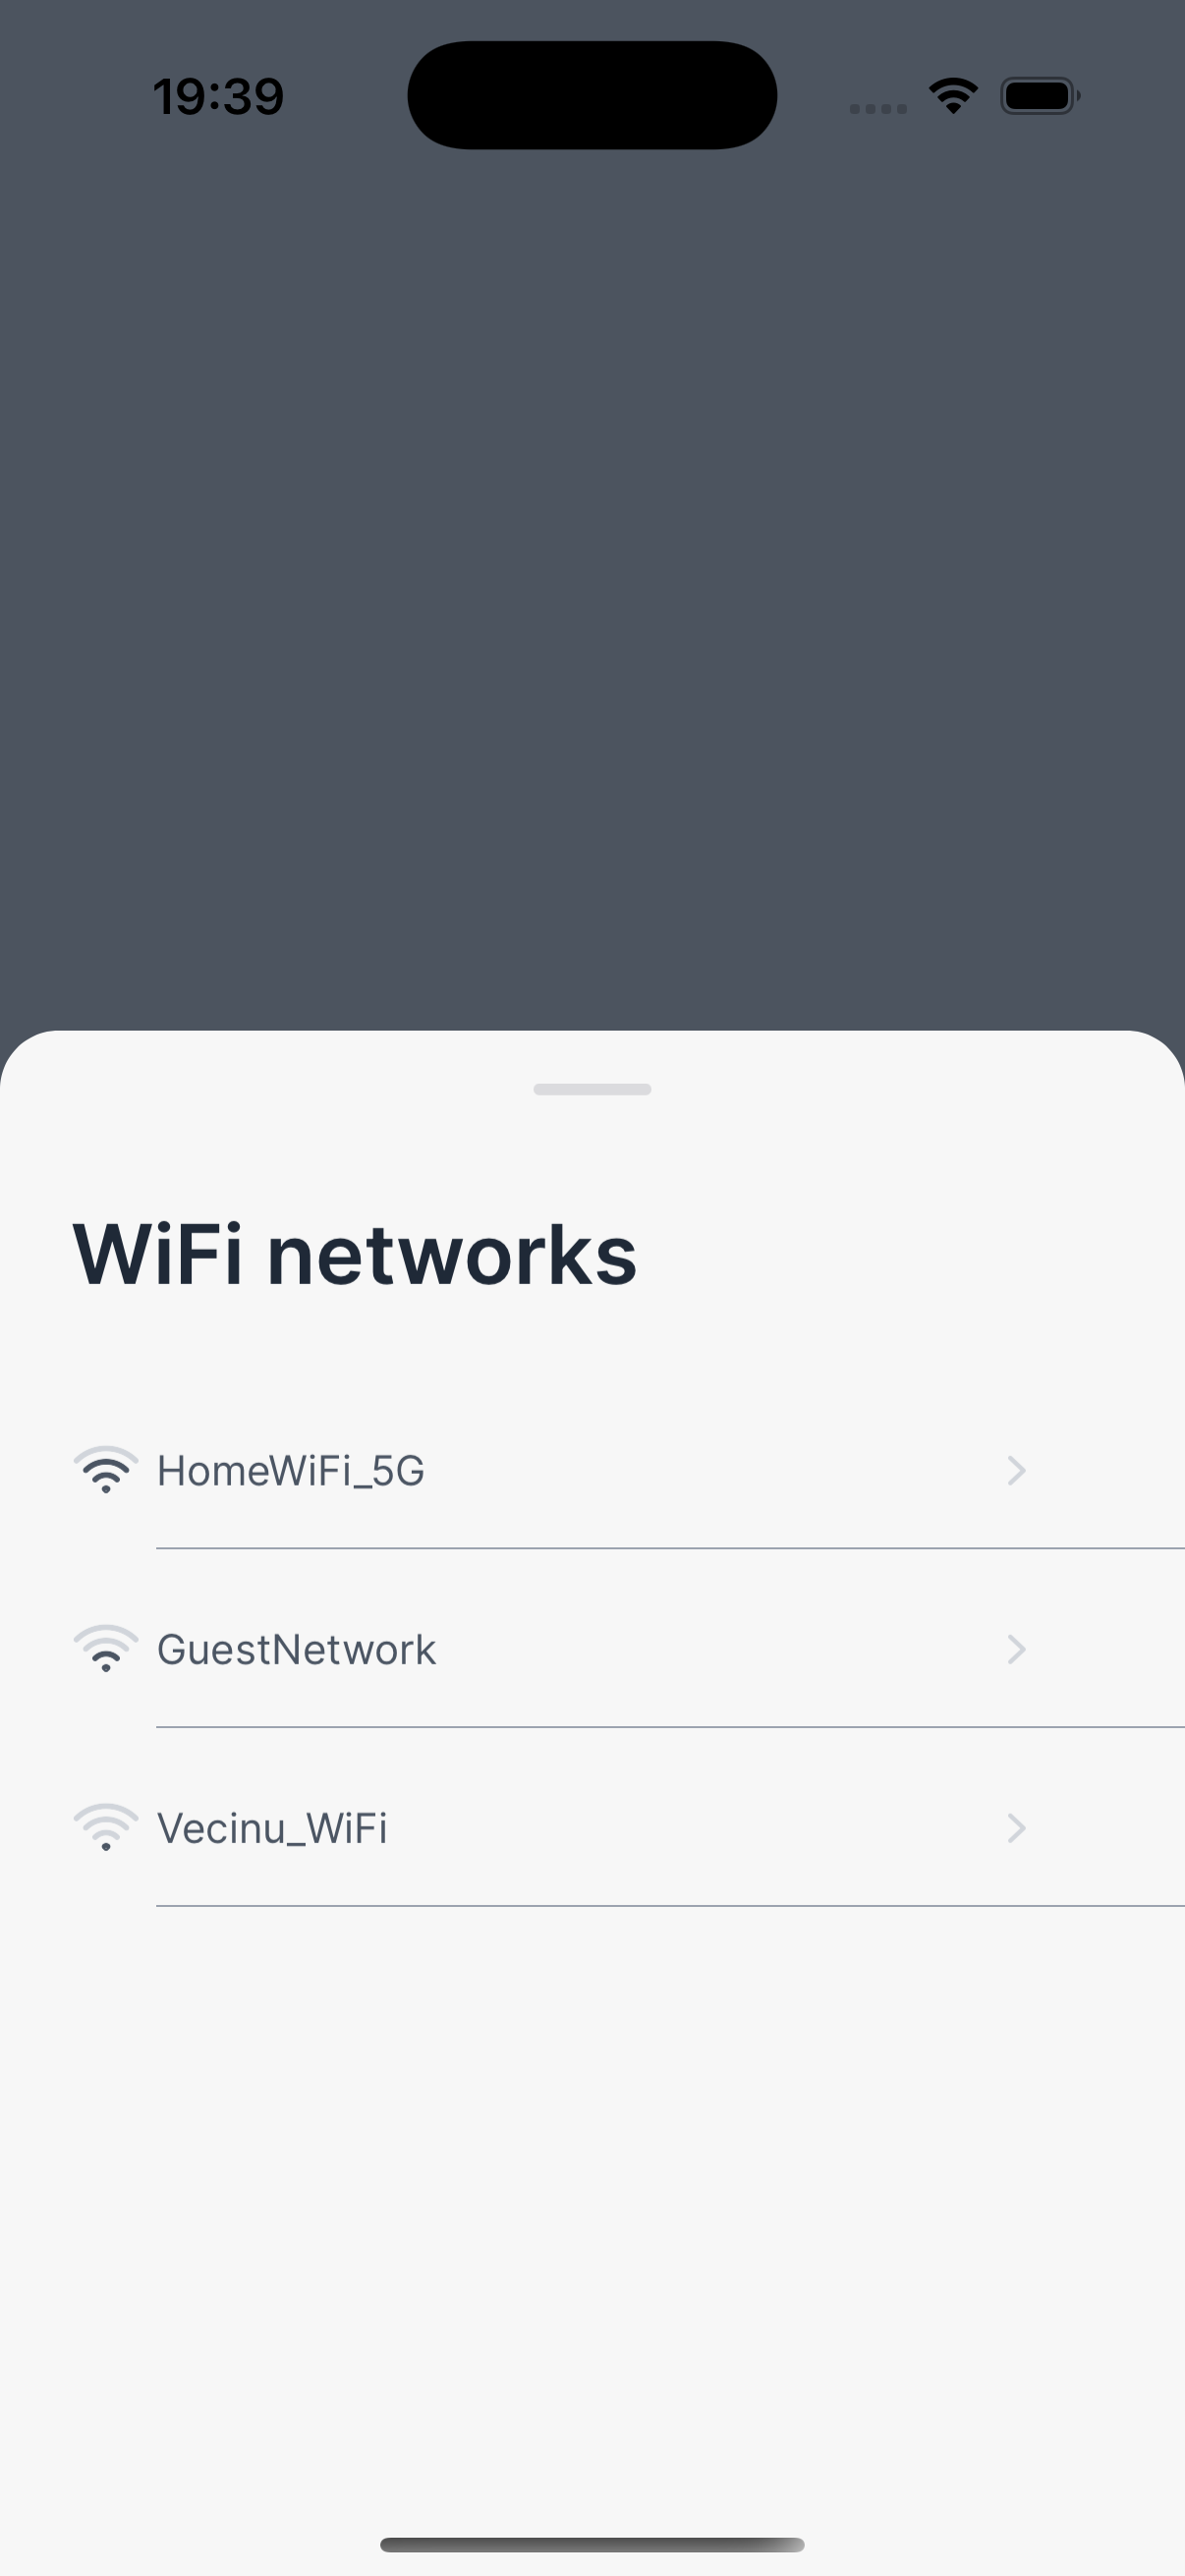
1. Choose your home WiFi network from the scanned list.
Enter WiFi Password
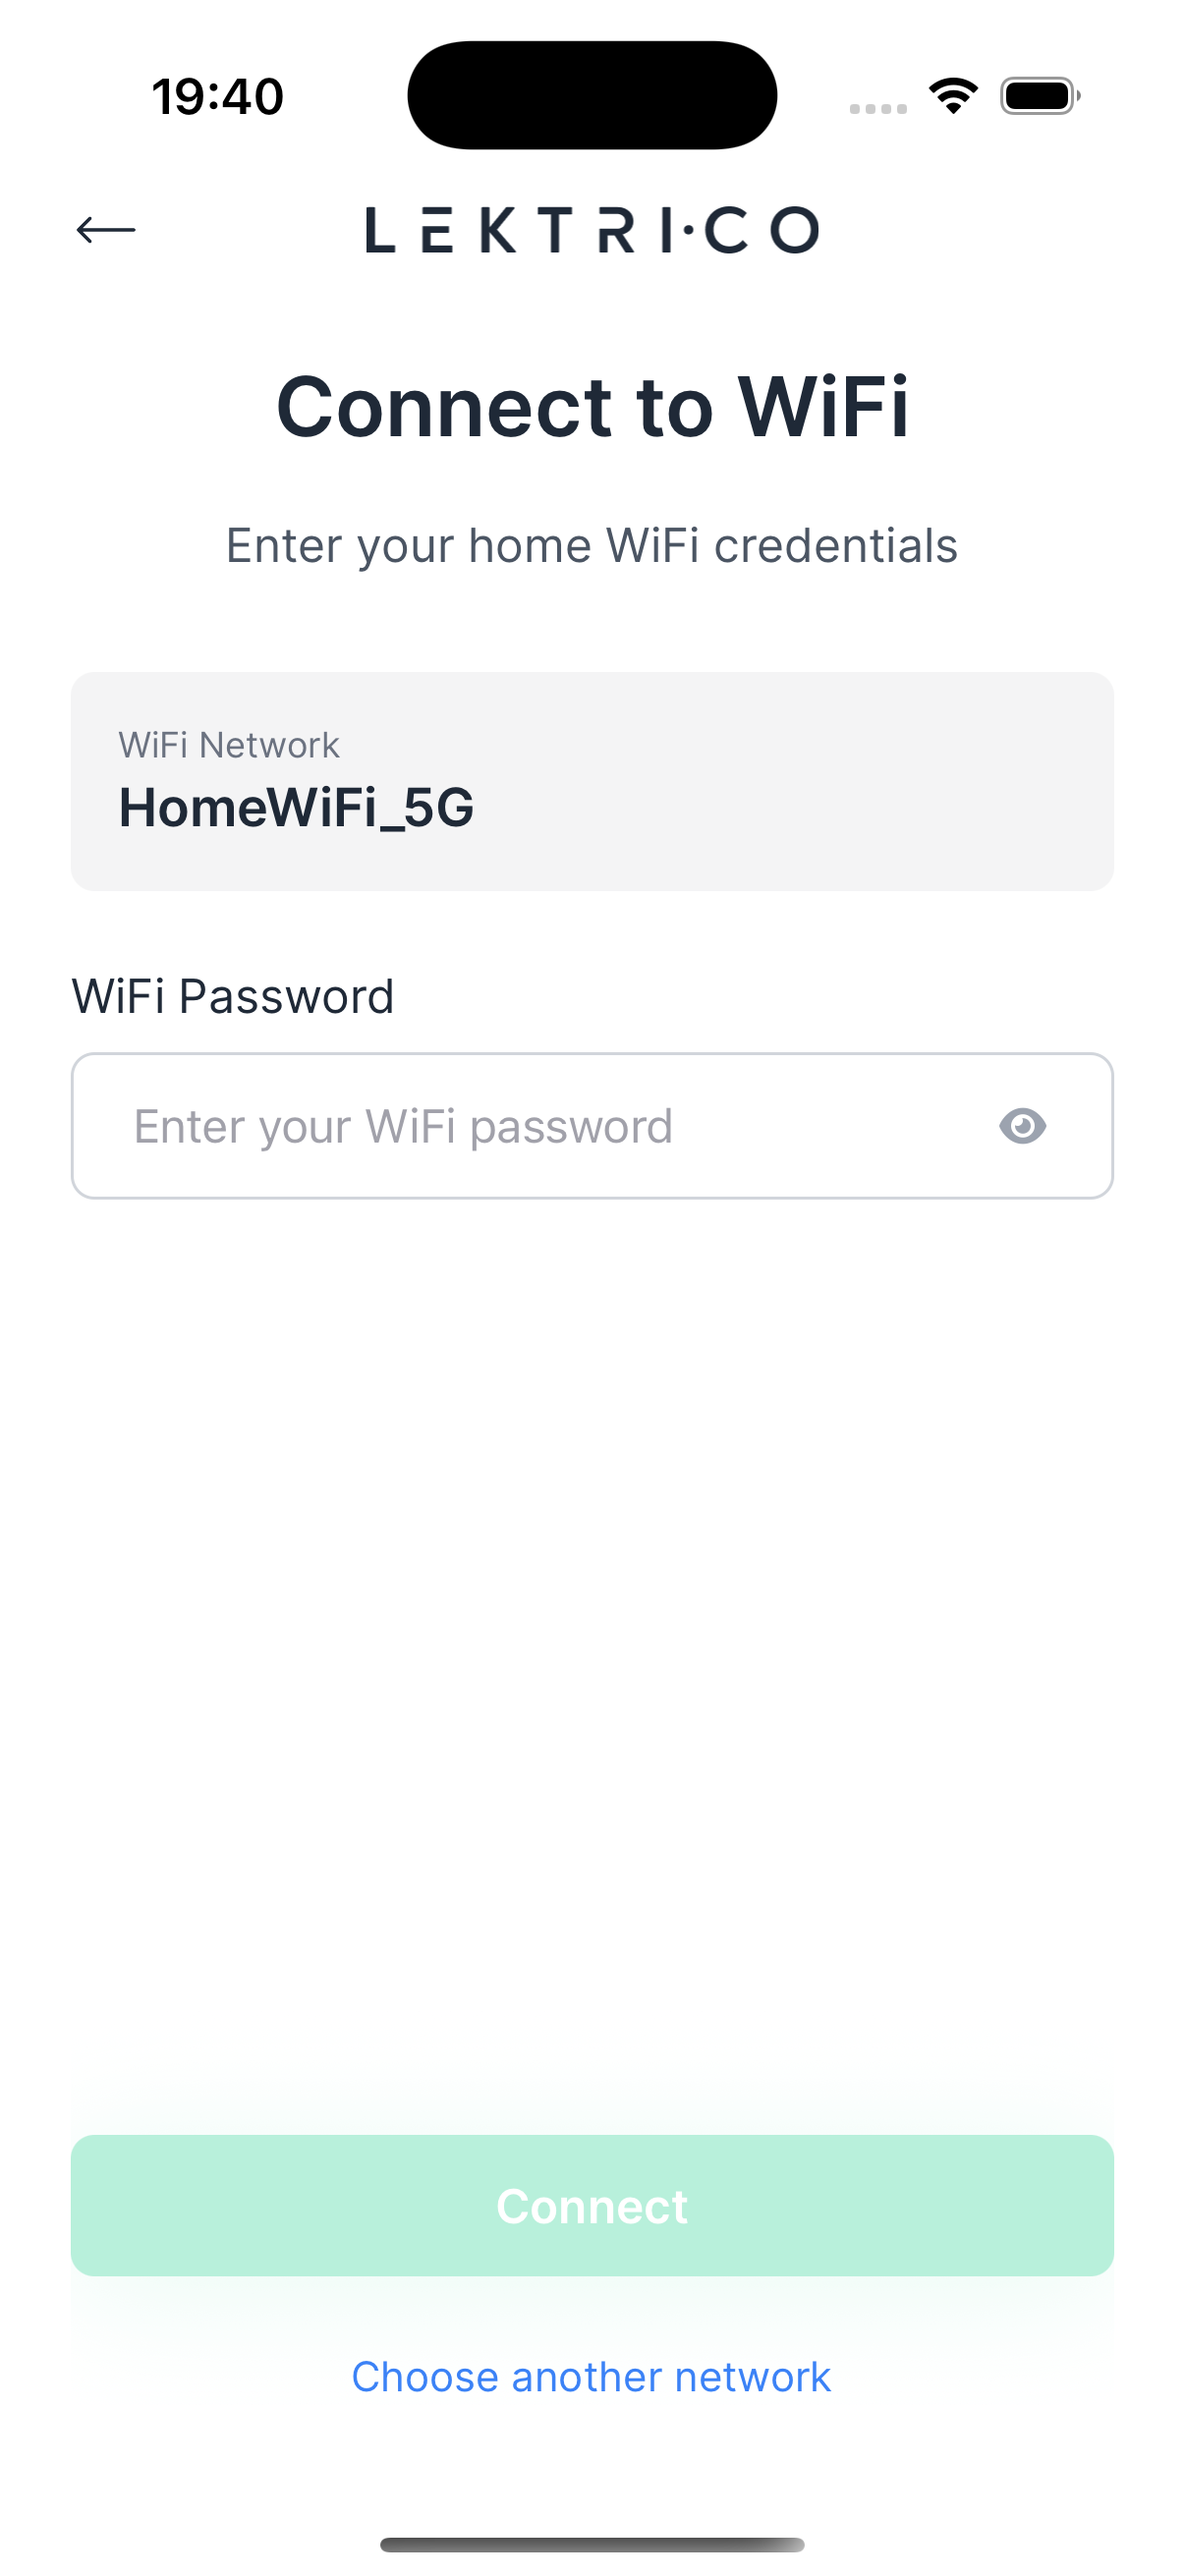
1. Enter your home WiFi password.
2. Tap "Connect" to configure the Shelly EM.
WiFi Connection Success
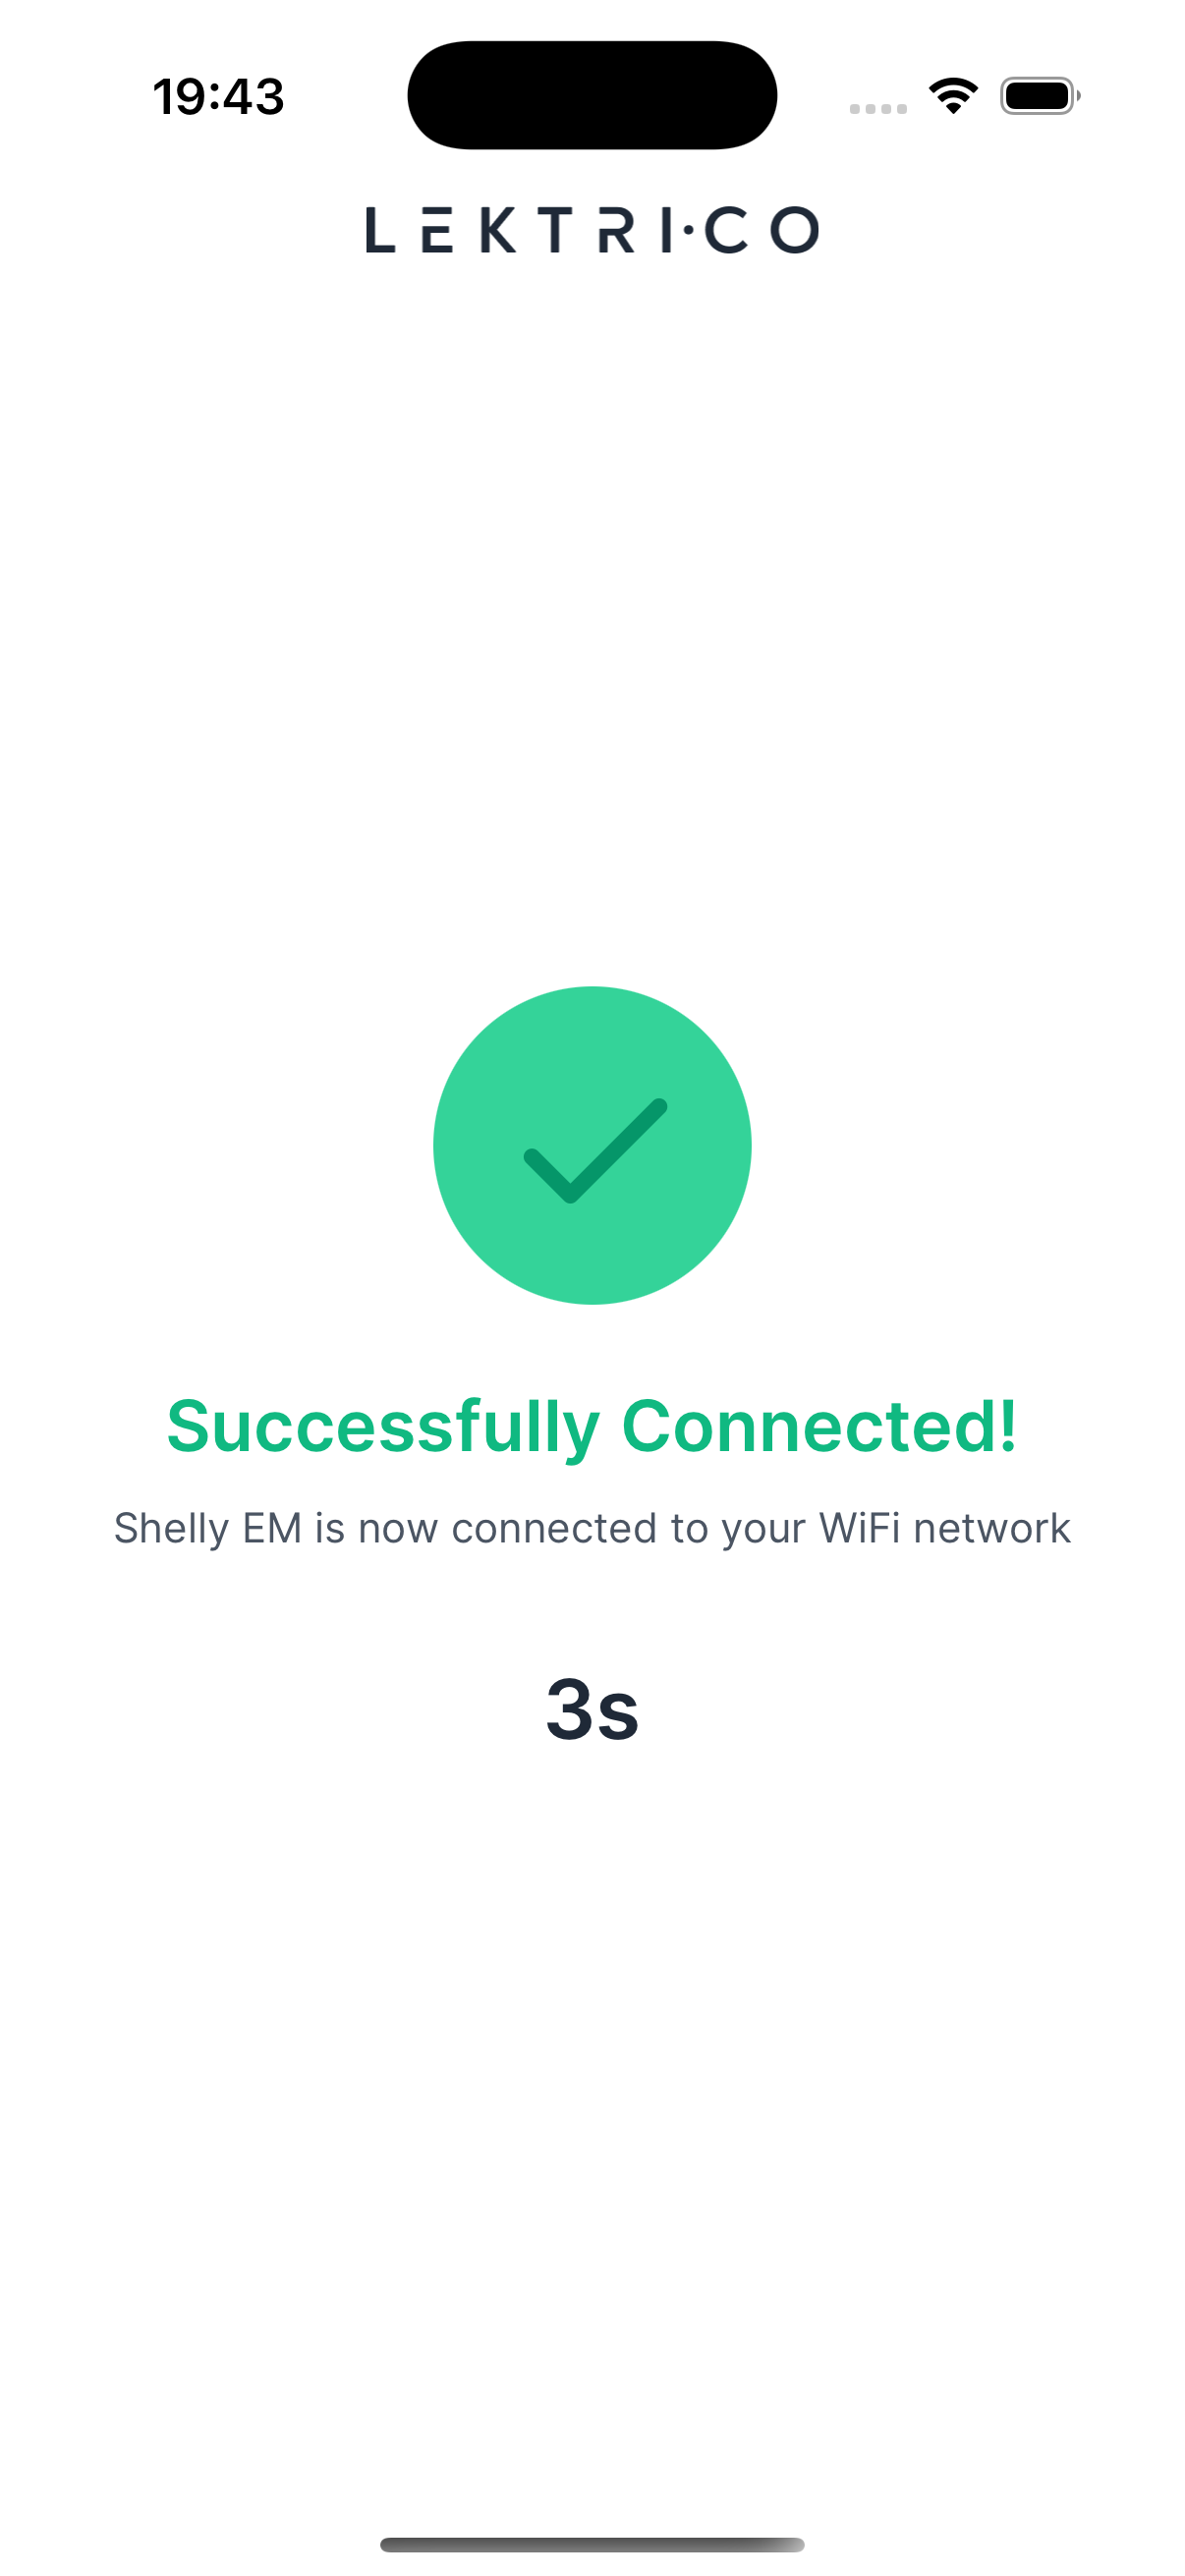
"Successfully Connected!" — Your Shelly EM is now connected to your home WiFi network.